It All Started with Twine?

So has everyone seen the fabric twine? It must be on Pinterest, because it is so cute. I saw it on The Quilt Show website. The first time I saw it I thought, Ooh, pretty! But the second time I saw it I was hooked. They used it to make a little rug! So I clicked over to the tutorial. I needed strips of fabric. I do believe I have a box of strips somewhere. 

I found the box of strips, and soon I was MAKING TWINE. Now, to be fair, she did warn that it was a little hard on the hands. Oh yeah. That twisting motion was very hard on my hands. I made this much, and knew that twine making was not in my future.

DSCN2953

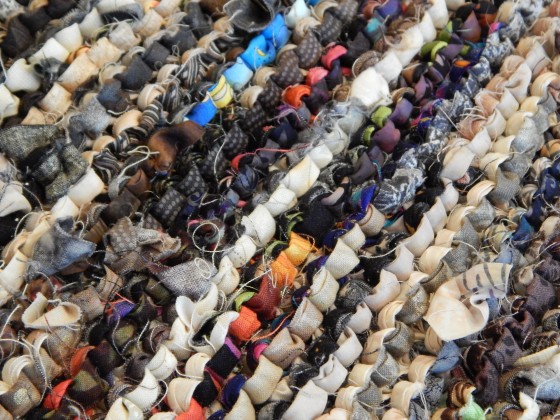
That made me a little mad, so I went back to the box of strips. There were plenty in there. I could make another knitted rug. I really do like these rugs. I have two in my kitchen, and they are nice and cushy to stand on. Plus, they are easy to wash. And free. And they use up a lot of fabric that I would otherwise be donating to the thrift store.

DSCN2954

Okay, so I got that rug started. The strips in the box were mostly neutrals, both darks and lights. I liked that idea, and decided to add just a few sparks of color once in a while.

DSCN2955

So about a week later I went into the studio with the intention of cleaning up. There were still some strips leftover in that box. I was thinking I would just toss them. I made the mistake of actually LOOKING into the box. There were three squares that I had started on a few years ago. They were from a fabric panel that had old inn signs on it. I really did like those signs, and I liked the way I had outlined them with the strips. Oh, plus, for some reason, there were two paper-pieced blocks in there. Maybe I should use these strips up and make a little quilt.

DSCN2949

ONE WEEK LATER, (and of course, with lots more strips cut out) I finished another WAY TOO BIG quilt top. It was very fun to work on this quilt, and it was a nice break from using my hands so much (machine piecing instead of hand work.) But 72″ X 72″? That’s gonna be a lot of dang quilting.

DSCN2948

Kandinsky?

DSCN2918

Some of you might remember this quilt that I started last summer in the Rosalie Dace class in Sisters. Ahhhh, Sisters. I love that place! Anyway, I got most of it done, and was adding some vertical lines with fabric, but I didn’t like it. So I started adding on the vertical lines with stitching. Yes, that would do. But then I came home, and construction, and boring, and … It got put away.

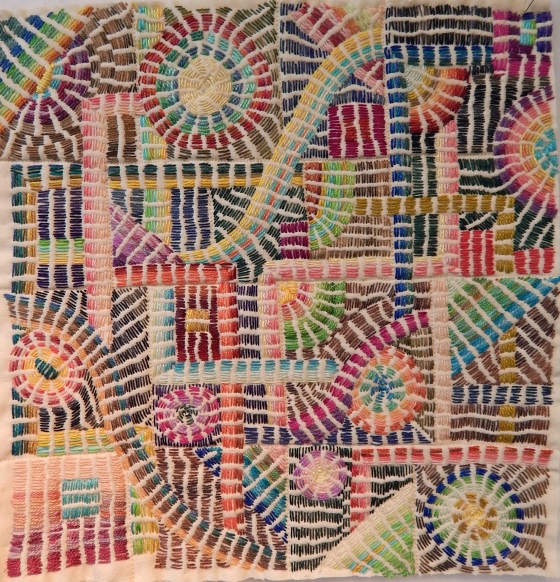
So the other day, after I had finished my last small embroidery, and still wasn’t able to put together another small quilt to embroider on, I went into the closet. There was the Kandinsky quilt, just waiting to have those vertical lines stitched on. I worked on the lines, which I had carefully pre-marked before I put it away, and added a few more. I had gotten some hand-dyed thread on Etsy, and wanted to try it out. So I added some lines of french knots, and did a little more stitching in the squares and circles.

DSCN2921

You can see I was mostly trying to be “abstract” and not do my usual kantha-style stitching. Couldn’t resist the circles though 🙂

DSCN2922

This quilt is an interesting example of why a single-layer construction makes for the most enjoyable stitching. What I mean is–the way I constructed this, because I was trying to work “abstractly” and also because I was in a workshop, was to put up a background fabric and then to add motifs on top of it. And more motifs on top of that, and then more motifs on top of that. So that in some places, there might be five layers of fabric. This is not enjoyable to stitch through. One layer of fabric and the batting is the most enjoyable to stitch through. And as I was talking this over with my BF, we talked about how to us this is an important feature of the handwork that we have chosen to work on through the years (knitting, spinning, hand-piecing, hand-quilting, etc.) I don’t think you have to sacrifice your art to make the construction of it an enjoyable experience. If I had been home, I might have added the first layer of motifs, and then cut out the backing fabric, etc.

Another feature that made it less enjoyable to embroider on was that I completely machine quilted it before I ever started hand-stitching. In general, I do minimal machine quilting before I start my hand-stitching. I usually have a piece machine basted, so that I can pull out the basting threads as I get to that area in my hand-stitching.

DSCN2920

Anyway, I know myself. I know that I am more likely to continue on and do more hand-stitching if it is an enjoyable experience for me.

One more thing about this quilt. At the beginning of the workshop, before we even started working on our design, I was finding it a bit depressing to just be working on a picture that had no meaning. One of the things Rosalie asked us to consider was “what do I want to communicate?” So I skimmed the Psalms, and wrote some key phrases in my notebook, and kept that in mind as I worked on this piece. It made the whole process more meaningful and enjoyable for me. The title of the piece is “All Praise Rising.”

This piece uses some of the first fabric that I dyed myself, as well as some sheers that some of my workshop comrades were generous to share with me. It has enough of “me” in it that now I am finding that I like it better than when it went into the closet. Its also a good example of that “continue on” theory of mine. It doesn’t always hold true, but many times in the middle of working, people find that they don’t like what they have done, or that their original vision has been lost. Whatever the cause, they are tempted to give up. That is when you should “continue on.” You might recoup your original vision, or you might find that you have created something infinitely better than your original vision. Or, you might find that you still don’t like it after all that work, and you might be cursing me 🙂 But in the meantime, valuable lessons have no doubt been learned.

Me and Kantha Stitching

A nice commenter asked a couple of good questions about my “kantha stitching.” Traditional kantha was done in India by using old saris, and other thin cloth, and using the simple running stitch in a variety of patterns to stitch the layers together. ( Anna Hergert has written an excellent article about kantha here.) Although I have the “big book” of Kantha now, my original inspiration was not antique kantha embroidery. The beautiful work of Marianne Burr was my original inspiration, and her work was originally inspired, I believe, by kantha. But her work has gone on beyond kantha, with her painting on silk, and her beautiful thread and color work.

The way I stitched the background of this quilt is similar to traditional kantha.

The way I stitched the background of this quilt is similar to traditional kantha.

So the way I do my kantha-style quilting and embroidery is this: I either piece together a top, or use a single piece and put together a quilt sandwich. The reason I do this is because the sandwich acts as a stabilizer for the embroidery. I have never ever liked using a hoop or a frame in any fiber craft. With the three layers of the quilt sandwich, I can stitch away and not have any distortion from the embroidery.

I have added french knots and lazy daisy stitches to the traditional running stitch of kantha.

I have added french knots and lazy daisy stitches to the traditional running stitch of kantha.

Sometimes I embroider through all three layers of the sandwich. This is usually around the outside edge of a motif (like a circle,)when I want to emphasize a shape, or to actually act as the quilting. But most of the stitches, especially the simple running stitches, are done only through the top and the batting. The reason for this is simply ease of work. Its much more enjoyable to stitch through one and a half layers than through all three layers.

I also use blanket stitch to raw-edge appliqué motifs to a top.

I also use blanket stitch to raw-edge appliqué motifs to a top.

My batting of choice is Quilter’s Dream Request Loft Batting. I started using this particular batting after a quilt teacher, Judy Danes, recommended it. That is where I learned to put my quilt sandwich together simply by steaming the layers together.  After I started the kantha embroidery, I tried various batts, but this same batt seems to work the best. It is easy to stitch through, and it does not generally “beard,” (where the batting will come through the needle holes to the surface of the quilt.) This is the thinnest of the Quilter’s Dream batts. I love the light weight of it, and the way it hangs.

I hope this is helpful. Just make yourself a little quilt sandwich and begin to play!


Before I Go Into the Studio…

Before I go into the studio, I feel I must post my progress here. After the last post, I got an idea of how to finish the design on the quilted embroidery piece. And that was it. I spent every evening working on this little piece, and one whole rainy day.

DSCN2883

As I got close to finishing the design, I thought maybe I could add some more french knots in the background. So I picked out 6 different weights and colors of perle cotton, and sprinkled them randomly around the empty spaces.

DSCN2886

DSCN2885

Now I have two of these little quilt embroideries. Whatever will I do with them? I do think I will mount them on the painted boards, and of course, if I ever really get serious about teaching, they will be wonderful class samples. Both of them are about 12 inches square.

DSCN1930

The other stitch I use quite frequently is the lazy daisy stitch. Maybe that will be my next little quilted embroidery. By doing the embroidery on a quilt sandwich, that provides plenty of stability, and I never have to use a hoop or a frame (something I have never enjoyed, even as a child.)

And now I will disappear into the studio! I made great progress on the hooked rug piece last week, and will share that later. I plan to switch gears again soon, and get back to quilting and piecing 🙂

Dabbling

Sometimes I have to write a post just to remind myself that I am getting work done. I titled this “Dabbling,” which I did indulge in a bit. But I also, I can see now, have progressed forward in my intentional art. And because of this blog, I can look back and see that it really was just a week ago that I posted about “switching gears,” because I wanted to get back to my rug hooking.

The thing about rug hooking–its that old saying “absence makes the heart grow fonder.” Suddenly, I get all sentimental, and miss my quilting horribly. And I think of all kinds of new, wonderful ideas that I MUST. TRY. RIGHT. NOW.

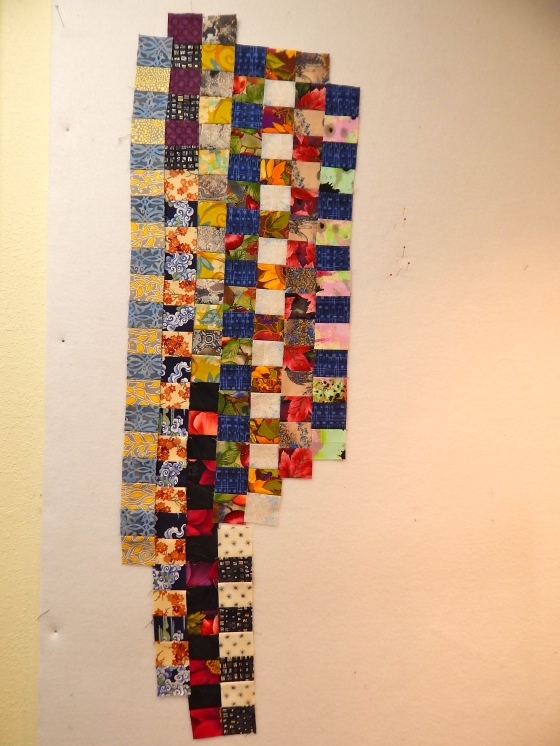
My box of little two inch squares was calling to me! What if I made long chains of the squares. Wouldn’t that be fabulous?

DSCN2836

Not.

Then, I got a card that had painted flowers on the front. MUST TRY to reproduce those flowers! I pulled out a huge stack of pink, coral, and golden solids. Free-hand cut the fabrics for these.

DSCN2837

Not that fabulous. Plus, I think its been done before. Like in the 70’s or something.

I had seen the work of this artist at the San Jose Museum of Quilts and Textiles. French Knots! Must do french knots!

I do think I started this more than a week ago, but I worked on it a lot this week:

DSCN2816

Of course, JUST french knots did not last very long. And I did not do all this embroidery in the past week. But I did do a significant amount of it, just as way of avoiding other stuff. DSCN2820

This is a fun little bit to do. Marianne Burr taught me this.

DSCN2819

I am always so inspired when I see the work of an artist who does everything by hand, like Marianne Burr and the french knot artist, and most recently, I came across this woman’s work. And then I start on a little piece like this, and inwardly I am whining, “but it takes soooooo lonnnnggg.” I can only laugh at myself.

And I did continue to work on the “what they said” series a bit. I am enjoying embroidering the lettering, and thinking about the thoughts behind the words, and how I can convey those thoughts and emotions through the way I do the lettering and through the simple machine quilting. (You can see I use the disappearing blue pen for some of my lettering. Don’t worry. It always disappears.)

DSCN2835

I made myself finish the quilting on the first one, and used Ricky Tims’ clever method of facing.

DSCN2813

And really, I did continue to do some rug hooking. Each section requires a bit of thought and of course a lot of angst. Is that color right? Is there enough contrast? Too much contrast? Am I just indulging my love of using ALL THE COLORS ALL THE TIME? 

DSCN2839

DSCN2838

Mostly I’m very happy with how its coming along 🙂

Wow. I am surprised at how much I have gotten done. I thought my week had been disrupted by OTHER STUFF, like exercise, gardening, and housecleaning. If you just insist on continuing on, it is surprising and rewarding to see the body of work that you can eventually produce.