A Quilted Year in Review

Well, this was a good exercise for me. Because I think I have been a bit scattered this year, and I know I have MANY unfinished projects. Starting a new project is always so fun and exciting, and sometimes (almost always) finishing a project is just plain boring. All the creative ideas have been decided upon and executed, and now it is mostly just grunt work putting in boring quilting lines (my apologies to those whose greatest love is the quilting line!)

So it was good to go through my archives and see that I had finished a lot of quilts, and to be reminded–oh yes, there is another unfinished idea and/or quilt…

In January I started my new “job” writing a column for The Quilt Life magazine as “the healthy quilter. Between this and my occasional blog for The Quilt Show website, it has provided good accountability for staying on track with my healthy diet. I lost (re-lost) 25 pounds in 2013.

quilt_life_cover

In January, I had the amazing experience of having my first gallery showing! It was an exhibit called The Housetop Quilts. I wrote about it here, and you can see a slide show of the quilts here. Here is the last quilt I finished for the exhibit.

IMG_8596

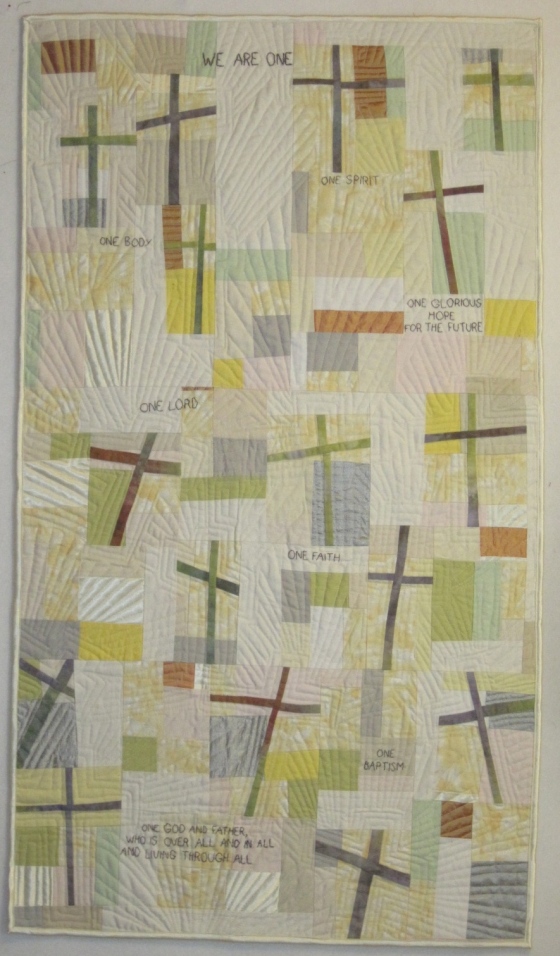
I went to Haiti in January, and two new quilts emerged in February that were directly related to that experience.

We Are One

IMG_9126

Colossians 1

IMG_9151

In March, I made a grand effort, and actually finished and bound this New York Beauties quilt (that I started probably over five years ago.) It is extensively quilted, and is pretty heavy because of the fabric I chose for the backing. It has been my winter bed quilt this year, and every night I get a lot of enjoyment out of looking at both the piecing and the quilting that I did on it.

IMG_9204

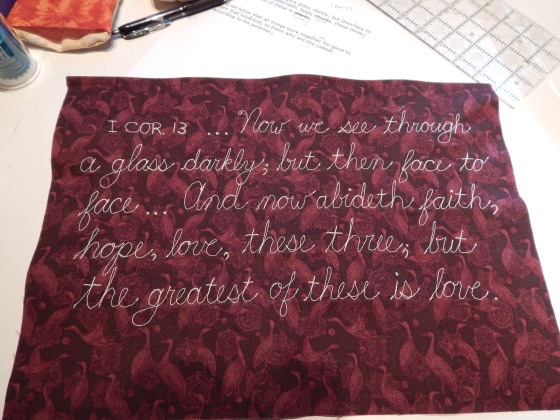
In April I finished a little quilt that might be my favorite for the year. The idea for the words started in December with the Sandy Hook tragedy. This quilt is in a series that I call “The Psalms.”

Hope in Uncertain Times

IMG_9363

May found me in Ohio at Nancy Crow’s Timber Frame Barn workshop. I loved the whole experience. I have not continued with the extensive strip piecing that I learned/did at that workshop. But I have learned that all of my experiences influence the direction of my work, even if I am not doing that particular technique.

I think I should call this a crazy little quilt. Because that is what it seems to me.

IMG_9581

In June I reverted back to the style that I had done in “The Psalms” quilts. I really like this style. Hmmm. I see this is a very unfinished picture of the quilt. Well, it is one that I am currently working on (the drudge part.) It has a LOT of circles and hand embroidery added to it, and the words of one of my favorite Psalms have been added. And then, for some unknown reason, I decided to hand quilt it. I work on it a little bit every night. Maybe it will be the first quilt finished for the new year!

IMG_9605

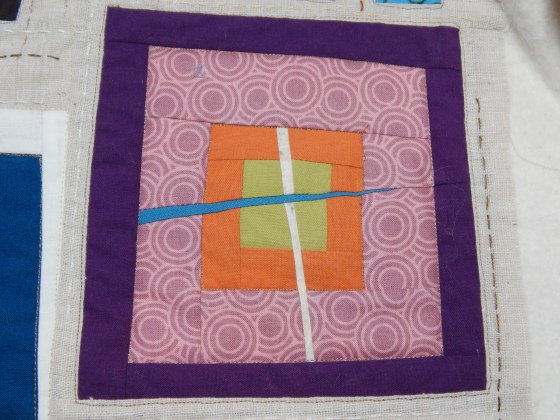
July: This is just one square from a large quilt (that I finished later in the year.) I like this technique very much (inserting skinny strips into a block) and included this to remind myself to try that again. I am also liking the use of prints WITH solids.

DSCN0043

August:  This is really a half-baked idea. I keep coming back to it, but I haven’t figured out how to make all the pieces work together yet. Perhaps the new studio will help : )

IMG_9867

September was all about finishing this hooked rug and attending the rug convention.

DSCN0117

Evidently I did not post any pictures in October. I know I was doing something. I did go to the Pacific International Quilt Festival, which is always inspirational and overwhelming. I met some of my SAQA (Studio Art Quilt Associates) compadres for the first time when I volunteered to work in their booth for a few hours. Joining SAQA has really been a great experience for me already. They have so many resources and opportunities, education and assistance. And the people I’ve met have really been so nice and encouraging. If you are at all interested in art quilting, I encourage you to check them out!

November: Here is the “mosaic cross” finished. Only its not finished either. I decided to include the “world” by hand embroidering a semi-sphere at the bottom with green and blue perle cotton thread. Whose great idea was that??? Well, it is mostly done. I will post the entire quilt when I finally finish it.

DSCN0479

And in December, of course, I was finishing Christmas presents.

DSCN0664

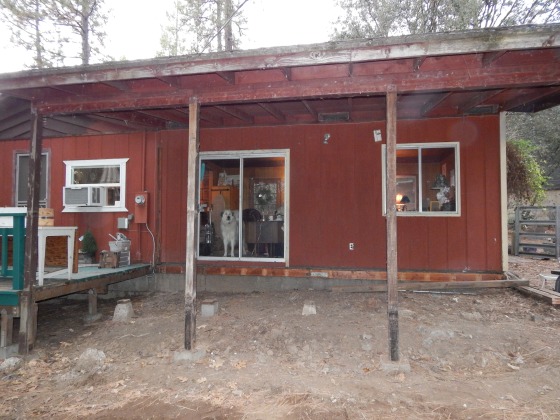
Well I can’t end this post without an update on the new studio. The contractor began working on it just one week before Christmas. I enjoy watching him work. He works very peacefully, looking at his work and figuring out the next step (a lot like us quilters,) and then all of a sudden, it seems, a LOT has been done. Every day I am surprised at the progress. Last night I came home and found the walls up, so you can see the outline of the doors and windows!

DSCN0771

DSCN0772

Oh, and where did I come home from?? From a trip to Costco, where I got cabinets for the studio closet, and 18 storage bins, and 13 project bins. I be getting myself organized in 2014!!

Machine Lettering

DSCN0664

Today I will show you two more special Christmas presents I made, and also talk about writing on cloth. I made these two pillows for my brother and my sister. My dad died in 2011, and he loved Pendleton shirts, silk ties, and the Word of God, not necessarily in that order. So I had been thinking about some project including his shirts and ties for a while. When I took Pepper Cory‘s class on the folded log cabin, I knew I’d found the right technique. (The folded log cabin is stitched completely by hand. Its a nifty technique, and I recommend taking Pepper’s class if you ever have the opportunity. She taught it expertly in just three hours!)

I first saw words used as a “quilting motif” in a lecture by John Flynn. I was fascinated! I think I’ve always liked putting words in my needlework (I used to do a lot of counted cross stitch.) So looking back, I can see that putting words on my quilts was a natural evolution.

Writing is one of the things that is easiest to do when you first start free motion machine quilting. Think about it–its one of the things you are the most familiar with drawing–you’ve been doing it your whole life!

I usually start by printing out the verse on a piece of paper. I measure the area where I plan to place the words on the quilt, and divide to see how many lines I can put in that area. Then I count the words and see how many letters I need to put on each line. This is all approximate, because sometimes my writing comes out differently than I had planned. Then you can do just like they do in books–crowd the writing to make it all fit in.

Here you can see how I backstitch at the beginning and end of each word. Then I just lift the presser foot and move to the place where I want to start the next word. After I am done with a line, I take those little snips and cut the threads right next to the stitching.

DSCN0644

Just a closer look:

DSCN0645

Another view, where I started and stopped more frequently, so there are more dangling threads. I always start by bringing the bobbin thread up to the top. In this view, you can see the chalk like that I drew to keep the writing straight. I do this especially when the writing is larger.

DSCN0654

And this is a picture of my favorite little chalk tool. It is a Clover device, and you can see the tiny little gear at the top that lets the chalk out in a very fine line. It draws on cloth so much easier and more accurately than a pencil. And it also erases easily when you are done with it. Sometimes I use the disappearing blue pen, but only when I plan to wash the quilt before I use/sell it.

DSCN0657

(do you see how the writing is a little wavy in the picture above? That is because I forgot to lower the feed dogs, so there was more tension than usual as I stitched!)

And the finished writing with all the threads clipped.

DSCN0661

I made the pillows using a very simple overlapping technique. For these 16 inch pillows, each back flap was 12 inches X 16 inches, so there was about 8 inches of overlap. Its a lazy way of making a pillow–no fasteners needed.

DSCN0666

You might wonder about the verses I chose. I asked my brother and sister separately if they remembered what Dad’s favorite verse was. (Dad LOVED scripture. I knew he had a lot of favorites.) So each of these were verses that Dad loved, but that had special significance for my brother and sister as well. I loved the entire process of making these pillows.

Christmas Presents!

This year I am giving several quilts and quilted things as Christmas gifts. I’ve kind of surprised myself with my organization and finishing pizazz. No more of that madly crafting every day and night until Christmas. Those days are long over.

DSCN0673

Two of the presents I will have to wait ’til after Christmas to share with you because one of the recipients just might be checking this blog. But the other ones I am pretty sure are not even aware of my quilt blog, so I can show them now.

DSCN0674

Did you ever have one of those projects? A super-big, enthusiastic project that you JUST LOVED? You worked and worked on piecing it, and then, even though some of your enthusiasm had flagged, you went ahead and chose special quilting motifs for it, and worked and worked on it. And then, you were DONE. Except the quilt wasn’t done. It just languished somewhere in an unfinished pile. Every time you looked at it, it just seemed like more work than it was worth for a quilt you really didn’t like that much any more.

DSCN0672

What? You’ve never done that? That pretty much describes half the quilts I make! Anyway, this really was a very big quilt, and it seemed like I would never finish the quilting on it. At some point, I looked at it and realized that those bright colors were perfect for my mom. And I have never made a bed quilt for her. So I got it out, and do you know, I had that thing quilted and bound in just a couple of days! Two years and a couple of days LOL.DSCN0669

It was from a pattern called “Rainforest.” Now that its done, I like it quite well again. And that is also how I am with most of my quilts.

DSCN0680

I also have a niece who is having a baby. I didn’t really make this quilt as a Christmas gift, but what the heck? I am going to see her on Christmas and so will give it to her then. This quilt was fun to make. I started with that focus fabric–the dots of color on a black and white print, chose solids to go along with it, and then made large nine-patches that I cut in quarters and re-designed. Its called disappearing nine-patch, and there are a million images out there. Very fun to do. You can see I quilted it quite simply with wavy lines. It doesn’t show, but I used a wide satin ribbon for the binding. I used to LOVE the satin edge to my blankies, so I like to do that for baby quilts.

DSCN0235


Another niece is expecting, and so I had to look through my stash of finished quilts. I found a really cute one that I think will do well for her baby too.

Have a very merry Christmas everyone! Don’t stay up late finishing projects. Santa likes his privacy.

DSCN0681

A New Studio!

I still can’t quite believe its happening! But it is. A long time dream is being built while I write this. I’ve lived in a 650 square foot cabin for 27 years. A couple of years ago, after I retired and started to work full time at being a quilt artist, I decided that my cabin would be my studio and I would just live in it. I had read that about some artists and it appealed to me.

Here's my cabin. The yellow part is where the studio will go.

Here’s my cabin. The yellow part is where the studio will go.

Right now the “dining room” is my main sewing room. I have my design wall in my bedroom, and a few smaller cabinets are in my living room. I do a lot of handwork, so of course I usually have a couple of projects going in the living room.

Almost since the time I moved in here, I daydreamed about closing in the back covered deck and making it a studio room. Ten years ago I started saving for it. And now it is being done, and the contractor says he will be finished in four weeks!!

Here's the deck once I cleared all the clutter off of it!

Here’s the deck once I cleared all the clutter off of it!

This all means that I have to make a lot of decisions. I’m not that fond of making decisions. One of the critical decisions I need to make is how much lighting to put in the room. Right now I have a 6-light S-shaped track light in the dining room. I just put it in there. It lights up my sewing table very well, and I have a couple of the lights pointed towards my fabric storage cabinet. The new studio will be longer–it will be 11 1/2 feet by 20 feet. But there will be a closet, so I guess I should say that the main area of the studio will be 11 1/2 feet by 16 feet. I will move the track lighting out to the studio. I think that adding one more florescent fixture (4 ft. long) will light the room well. Does anybody have an opinion about this?

Here's the space with the flooring and siding completely removed!

Here’s the space with the flooring and siding completely removed!

Monday I am going to go and look at flooring, doors, and windows, and paint colors (for the outside of the house.)

I am using my handy dandy notebook with the graph paper to draw out my ideas on how I want to lay out the furniture/storage. And it just happened that there was a virtual studio tour online the past two weeks, so I have enjoyed looking at those ideas as well. I think the thing I liked best was that some of the artists showed their studios in their natural state–made me feel a little better about the mess I usually have!

Finishing Quilts

Wow, I had a hard time photographing this quilt. I tried so many different settings on my camera. In the end, I think it was maybe the computer, and not my camera, that was having a hard time with the all the white.

DSCN0640

Anyway, this will be the “header” for the series of quilts called “The Signature of Jesus.” Most of the quilts will simply be a cross with the words “God so loved the world” embroidered on the quilt.

For this one I had the idea of asking various friends what the cross really meant to them (not a theological explanation, just a personal thought or feeling.) I don’t have that many friends, so I did get some of the words from my other “friends”–some of my favorite authors : )

DSCN0632

I enjoyed working on this quilt from start to finish. I enjoyed choosing pairs of fabric for each cross. I free-cut the rectangles and the strips for each cross.  And again free cut each rectangle and inserted the strips of the cross.

Then of course, after I put them in a grid on the design wall, I had to make them all fit together. That was probably the hardest part, but it really isn’t that hard. It does involve a little math : )

DSCN0629

Once the top was put together and the quilt sandwich was assembled, I machine basted it, and also quilted the outlines of each rectangle and cross.

THEN, I embroidered the words under each cross. I had more than 16 words, and so I used my sketchbook to decide which words to use and where each word would go, and also as a reference so that I wouldn’t repeat any words!

DSCN0630

Then I embroidered the large words “The Signature of Jesus” across the top. You might still be able to see the blue pen (disappears with cold water) that I used to draw the lines for the writing. I like to use lines when I want the writing to be straight and even. For the smaller words, I use Gwen Marston’s trick of making a line with a ruler and my thumbnail! You would be surprised at how long a crease made with your fingernail will stay in the fabric.

I really enjoyed machine quilting the background of each cross. I matched the thread color to the fabric, and basically quilted around the motifs of each fabric.

DSCN0614

And last, I machine quilted the close lines. I free-motion quilt the straight lines, because I like the organic look of them.

DSCN0631

I bound it using the method where you bring the backing fabric around to the front. And I was reminded once again that I do not care for this method. It seems like it would save time, but I don’t believe that it is any faster than traditional binding.

And on to the next project!

Making Progress

I’ve been making progress on a number of quilts this week. I went through a huge unorganized pile of quilts and quilt tops and organized them into several categories:

  • Quilts needing a binding
  • Quilts needing finishing touches
  • Quilt tops that I would like to finish sooner
  • Quilt tops that I can finish later
  • and, Finished quilts.

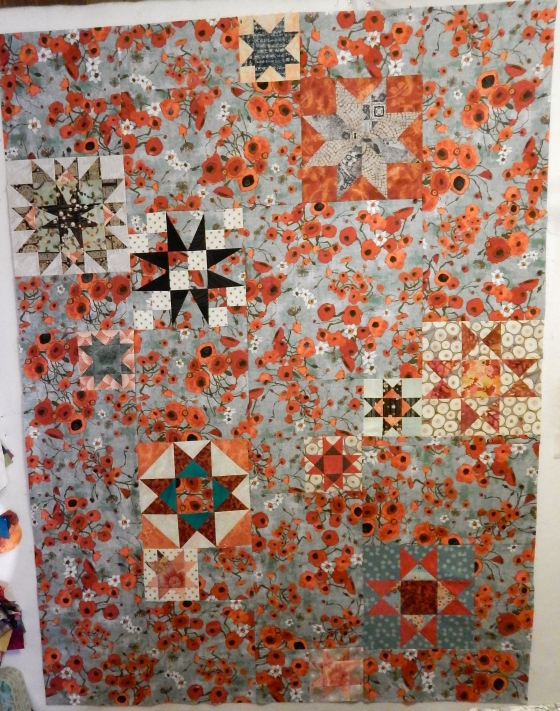
So I got the binding put on one quilt. I’ll show that one later–the pics I took were not good. And today I decided to get out the star blocks I had made at that Alex Anderson workshop back in March and get it finished. If you remember, I wanted the stars to float on top of the focus fabric that I had chosen as a background.

This is how I did it. I took the yardage of the focus fabric and draped it on my design wall. Then I started arranging the stars on it. Believe it or not, I liked my first arrangement, and I was surprised to find that I didn’t think I needed any more stars. Then I got some graph paper and drew a schematic for where the stars would be placed. I made it easy on myself by making the plan on a grid of 6 and 12 inches (the size of the stars.) Then I took a photo of the star’s placement on the design wall, and printed that out as a guide for where to place each star.

DSCN0617

By using the grid/graph paper pattern, I figured out how I would be able to piece it together, and made a list of how many and what size pieces I would need to cut out (of the focus fabric.) I checked this twice (because that is where you can make a lot of mistakes…) I only cut one piece wrong–I cut it 11 1/2 inches instead of 12 1/2 inches. There was nothing to be done but to cut a 1 1/2 inch strip to add to that piece (at that point I didn’t have enough fabric left to cut a 12 1/2 inc piece.) In the long run, I don’t think anybody will notice (except me, once in a while.)

DSCN0616

And then, referring carefully to my reference photo and my graph drawing, I pieced it together. I even figured out what I will use for a backing. Tomorrow I will put that together and maybe get a sandwich made!

DSCN0603

I am excited about the possibility of a new springtime bed quilt.

From Stuck to Unstuck

After the last few weeks of creative flurry, I came to a grinding halt. Nothing I had done pleased me. I didn’t know what next step to take.  This happens often enough that I no longer get quite as alarmed about it (“will I never be able to create a single thing again?!”) 

I just take a quilting break. This time I decided to quilt during my quilting break LOL. I had seen this very simple Christmasy pattern that really appealed to me. So I got out my big box of little squares, picked out all the red and green squares, and added in a few black and white ones. Voila! Half the cutting was already done. I had some really nice muslin on hand, and I knew what focus print I wanted to use. Surprisingly, I was able to locate it right away! I love this cardinal fabric.

And I made this square:

DSCN0545

The rest of the quilt got put together fairly easily. I even got out my Singer Featherweight, and sewed on a TV tray while I watched some of my shows on my computer.

That quilt top is almost completely assembled.

But before I finished it, I got a bit of a new idea. And since it was my birthday week, I let myself play with that idea yesterday. I really like it. Just wonky log cabin blocks, with solids, and using some of my pre-cut dark strips (I love it when I am able to use up some of the fabric that has been pre-cut.)

DSCN0554

Creativity in process:

DSCN0548

I love the look of these, and think they will look good surrounded with more dark. And guess what was in the box of dark strips? A bunch of little 4 inch log cabin blocks made mostly out of the dark strips. Bingo!

DSCN0555

And as suddenly as it started, the quilt block is over!