Cleaning Up and Switching Gears

I’ve been telling myself I needed to get back to rug hooking for quite a while. A couple of mornings ago, I went into the studio, determined to switch gears. I was still mid-stream with the “what they said” series. So I decided to finish putting together the sandwiches that day, and at least that part of the project would be complete. I was afraid that if I didn’t do that, I might never finish. Eighteen little quilt sandwiches complete! The embroidery on the wording is coming along quite well. I work on those in the evening.

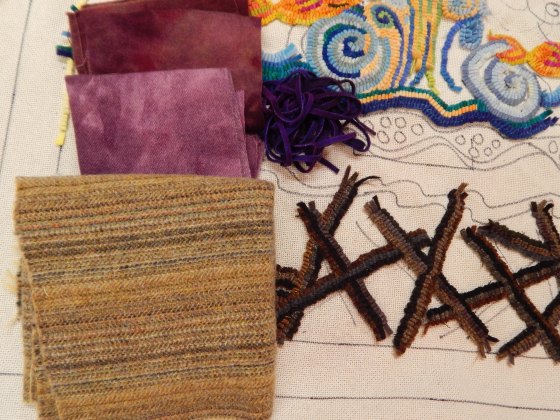
And so the NEXT morning, I put away the sandwiches and the remainder of the bolt of Kona Snow, and I got out my rug hooking. I need to have enough room to spread out my wool “worms. My cutting desk is just right.

DSCN2797

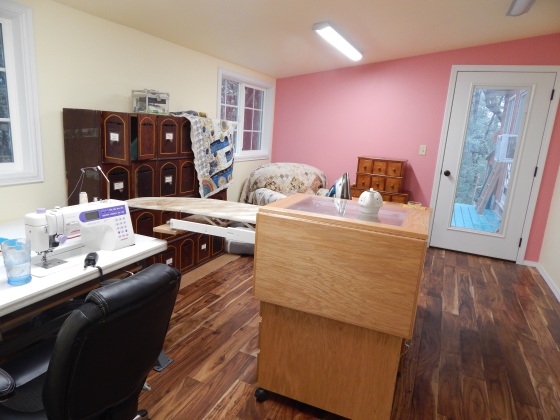
The NEXT MORNING, I walked in the room and thought, wouldn’t it be nice to work in a clean studio? And really, ten minutes later, it was clean enough. And so much nicer to work in.

DSCN2798

Some parts of rug hooking are similar to quilting. Value is very important, and auditioning colors and fabrics for projects looks much the same.

DSCN2795

DSCN2793

Different hooking techniques are tried out.

DSCN2790

DSCN2796

Pictures are taken and shared with my one rug hooking friend to get input and advice.

And then, finally, I am ready to get to work! Sometimes I have to gently tell myself that all this pondering and experimenting are an important part of the artistic process.

The Studio, Decorated, and as Clean as Its Gonna Get

For the first time, I have enough room to host my little group of sewing ladies! We meet together once a month to sew and chat. With the living room renovation, and the studio added on, there is enough room for all of us to fit into my house and have room to sew.

I decorated the walls last week:

The wall by the sewing machine. The empty frame is a bulletin board for inspirational thoughts or pics.

DSCN1148

The wall by my comfy chair:

DSCN1149

And one of my favorite quilts, by the back door:

DSCN1146

And this afternoon, I put most of the stuff away (SO GLAD I have a closet in this room!) So this is as clean as this room is probably going to get. All ready for the good times tomorrow!

DSCN1198

Oh, and this morning I put together my “big board” ironing board. So excited to have this. I have a little pull-out ironing board that I use for piecing, but this will be great to use when I am making my quilt sandwich, or just needing to iron larger pieces of fabric. You can see that I made it to fit on top of the little desk, so the desk can do double duty as a cutting and design table or an ironing board.

DSCN1200

My contractor was nice enough to pick up some plywood and cut it to fit. I made it only about 1 inch bigger around than the desk. Its 3/8″ plywood, so it is not too heavy or awkward to carry. I covered it with 4 layers of batting and stapled those in place, and then I laid it on the top layer of cotton fabric, and stapled that in place.

I am so blessed to have this new room that is dedicated to my art. It is a peaceful place to work.

Back at it!

Saturday I felt good enough (caught a cold at the end of my trip) to try to get back in the swing of spending a day in the studio. I was having trouble starting work again in my brand new space–you know, the inevitable messiness of a new project.

So I started out small, with an orphan block and a few solids I had left on the table before I left on my trip (remember, I made a little travel quilt to take with me.) And pretty soon I came up with this little composition that I really liked.

DSCN0996

There were still some bright solid scraps left on the table, and I was feeling pretty good about my accomplishment, so I thought I’d go ahead and make one more little quilt top. I went into my bin of solids to add a few colors, and pretty soon I noticed that I was choosing much quieter, more subdued colors. So I decided to just go with that. I wanted to make some smaller pieces. I made four, and then found a bit of a pale print to frame them, and I thought I was done.

DSCN0993

But the longer I looked at it, I realized it needed a little something more. So the next day I just took the scraps of the same colors and started adding them onto the sides.

DSCN0994

I really liked this composition too! So much so that I decided I needed to go ahead and quilt it today.

DSCN0999

(close-up of the quilting)

DSCN1002

SO! MUCH! FUN!

And best of all? Look–my sewing table is still clear, waiting for the next project!

DSCN1003


Maybe with the additional space I’ll actually be able to start a new habit of putting things away when I’m done with them. Well, I can dream, can’t I?

P.S. Here is a shot of the design wall in place. That dark piece is one of Ricky Tims’ hand-dyes. I have it up there auditioning for a big project I have in mind.

DSCN0987


Working on the Studio

When I returned home from this long trip, my living room was completed! That meant that I could start moving some of the stored furniture out of the studio, and start to see the studio as a real studio, not a furniture warehouse and substitute living room! Its taken a few days, but I’ve got the bare bones worked out. Decorating will come later. I’ve got a few of my small quilts and other pieces of art put aside to use in the studio.

This picture shows the design wall. I took it off of my bedroom wall, and the covering (some type of fleece/flannel stuff that I got at Walmart) looked a little dingy. And it had gotten a little stretched out of shape from the removal process. So I decided to take that fabric off and try washing it. It came out great. I am hoping to get the design wall actually put up today. Its an awkward job, but I think I’ve got a plan! It will be a 7 foot by 8 foot design wall. My track lighting will go where that bare lightbulb is, and I am hoping that it will be useful in trying to get good photographs of my quilts.

You can also see the arrangement of working furniture in this picture. Of course my sewing table is under the window. And the work surface/cutting table/desk is right there in the middle. But the smaller piece of furniture that is a little taller than the desk is a really useful piece that I bought at a quilt show a few years ago. It is a light table, that has a small ironing board that pulls out (that I use ALL THE TIME,) and it also has 4 drawers that house my regular thread collection. I am thrilled that it fits in this position. It means that I will be able to easily iron small pieces and seams as I am working at my sewing machine.

DSCN0982

Here it is with the little ironing board pulled out (needs to be recovered!)

DSCN0986 

 The sewing table, already a little cluttered, as I attempt to get back in the swing of things. And next to it is my grandpa’s cupboard that will house most of my stash. I wanted to get something to set it on, but am having trouble finding something with just the right dimensions. So for now it sits empty on a piece of cardboard. I won’t fill it with fabric before I find its final resting place!


DSCN0983

And a view of my hand sewing corner with my comfy chair, the doggie bed nearby, and the former CD cabinet that will be great for storing all those small bits and pieces that we quilters end up with (I believe they are called notions in the stores…)

DSCN0984

The next time I write, I hope I will be reporting on a correctly installed design wall and a new bit of creative work!

The Last Quilt and the First Stitch

Haha. The title is much more dramatic than the mundane reality of moving an entire studio from one location to another. The new studio is finished, and furniture is moved in. Some of the fabric has been brought in, but none of it is in exactly the right place.

Anyway, last weekend I took a couple of days off, just to get out of the house and the endless construction, and went to a hotel for a little personal quilt retreat. I found my box of good scraps under my bed, and chose some fabrics I liked, and then found a piece of “fabric I love” and grabbed that to go along with. I looked through my Gees Bend book for inspiration, and found one of the housetop quilts that I thought would be fun and easy to construct.

I managed to make 9 blocks while I was gone, and finished the other seven after I got home. So this is the very last quilt to be on my design wall in my bedroom.

IMG_0068

Its nothing spectacular, but it was fun to play with those fabrics I like, and very relaxing. It doesn’t look finished to me. I might add another row to it, or embellish it a bit. You can probably see that its not very straight. That’s what happens sometimes when you work improvisationally  and quickly. But its cloth, and it’ll all come out fine in the wash. Literally haha.

When I got home from that trip, the studio was completely finished! I posted a lot of pictures on my other blog . In case you only read my quilt blog, you can click here to see those pictures.

And here is the very first stitch I am taking on my sewing machine in my new studio. How fun.

DSCN0966

I was just putting some borders on an orphan block to take with me as my travel quilt for this next trip.

DSCN0961

I am headed to Haiti and to Texas! I can hardly wait to get home and really get my studio set up the way I want it to be.

New Work

New work–in more ways than one! The studio is progressing rapidly. This time I wrote a post over on my other blog. You can click here to see the latest pictures of the construction and progress.

And in the midst of all the cleaning and clearing, I decided I had time to start a small piece for a SAQA exhibit. It is only supposed to be 7″X10″. Surely I can finish that before January 31st?

Well, almost all of my fabric had been organized and put out in the storage shed. There was just one last pile to organize and clear up, and as I went through those fabrics, I put aside a small pile that I thought might work for this piece.

In the end, I decided to do another in the “Signature of Jesus” series, combining the cross with the kantha embroidered circles that everyone loves so much. When I went out to the storage shed to see if I could find my thread, it was the first container I saw, right inside the door! I think that’s providential.

One of the hardest things was to figure out how to make sure it was only 7X10. I made the top, and then cut it down a little, and then I marked that black line at 8X11, so even if there is a little shrinking with the stitching, I at least have a guideline to know where the quilt will end.

This is the first time I included words within the circle stitches. I like it very much. I have a lot more embroidery to do, and then some more quilting. But I think its doable, don’t you?

DSCN0805

It makes me happy to have little moments of creativity in the midst of the building and cleaning havoc.

Studio Update!

Things are moving along so quickly with the studio, I can hardly believe it! In spite of starting the work right before two of the biggest holidays of the year, the contractor has continued to work steadily, and here is what it looks like today.

While browsing the local antique shops for a piece to place my grandpa’s cupboard on, I ran across this desk. It seemed just right for a multi-purpose cutting/ironing table and desk. And it was in great condition and was real wood (white oak,) instead of the laminate I was considering. After thinking about it over the New Year, and checking on the ideal height for me for cutting/ironing, I went back to the store to look at it. It was exactly the right height, and I even got a discount on it. It took a bit of doing, but we fit it in the back of my car and it came home with me.

DSCN0792

Then the contractor and I had to carry it up this little ramp and across the studio space to the deck to store it until the room is finished. I said it was like a circus act, carrying that heavy desk up a little ramp like that!

DSCN0795

Here’s the view of the room from the deck-side doorway. You can see the closet partition now.

DSCN0793

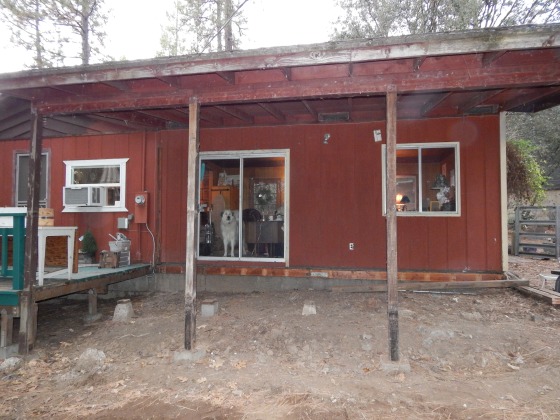
And here is a view from the outside with the siding and the windows in place already!

DSCN0794

We talked again about outlets and lighting, and he put all the wiring in so that on Monday he can start on the insulation and drywall!!

While I was out I went to the paint store. Do you know how many colors of white there are???

On the Way to Organization

While emptying out my grandpa’s cupboard (where I keep the majority of my stash,) I came across a pile of squares and circles.

"Grandpa's cupboard"

“Grandpa’s cupboard”

The squares were left over from the recent baby quilt I made for a niece, and the circles were from an abandoned project (I think.) I also save the circles that I cut out of the background fabric when I zig zag circles on top.

(back of quilt top, showing the circles trimmed out.)

(back of quilt top, showing the circles trimmed out.)

Anyway, they were right near the leftovers of a cute print that I had used for the back of my niece’s baby quilt. Hmmm. I wonder if I could make something out of these? I have another niece who is pregnant, so need to be fair and make her a quilt too. And wouldn’t it be fun for these baby cousins to have similar (but different!) quilts.

DSCN0784

This project was so fun. I sewed the squares into four patches. I cut rectangles from the print to add to the four patches. There was just enough of the print to cut out two squares the size of the four patches. And two four patches that did not have the print added to them. Then I started zig zagging the circles on top. As I cut the back out of the circles (to minimize bulk,) I saved those circles to be used in other squares.

DSCN0783

After all the pieces had enough circles attached, I figured out how I could fit these squares and rectangles together evenly, and sewed them into strips, and then joined the strips into a small quilt top. I refused to put it on the design wall–just joined them together as they looked good on the sewing table. I love the way it looks. Its only 36″ square, so I plan to get some solids that match and cut 2 1/2″ strips to add borders all around. And of course, I still have a few circles to add to the borders. I will say that zig zagging pieces is a lot easier when you are just adding them to a block instead of a whole quilt top.

DSCN0780

Studio update: I have windows! And the huge organization/purge continues. I filled 6 grocery sacks with good fabric to give to my crafty sister and nieces! Don’t worry, I have plenty of fabric left for my own use…

DSCN0786

A New Studio!

I still can’t quite believe its happening! But it is. A long time dream is being built while I write this. I’ve lived in a 650 square foot cabin for 27 years. A couple of years ago, after I retired and started to work full time at being a quilt artist, I decided that my cabin would be my studio and I would just live in it. I had read that about some artists and it appealed to me.

Here's my cabin. The yellow part is where the studio will go.

Here’s my cabin. The yellow part is where the studio will go.

Right now the “dining room” is my main sewing room. I have my design wall in my bedroom, and a few smaller cabinets are in my living room. I do a lot of handwork, so of course I usually have a couple of projects going in the living room.

Almost since the time I moved in here, I daydreamed about closing in the back covered deck and making it a studio room. Ten years ago I started saving for it. And now it is being done, and the contractor says he will be finished in four weeks!!

Here's the deck once I cleared all the clutter off of it!

Here’s the deck once I cleared all the clutter off of it!

This all means that I have to make a lot of decisions. I’m not that fond of making decisions. One of the critical decisions I need to make is how much lighting to put in the room. Right now I have a 6-light S-shaped track light in the dining room. I just put it in there. It lights up my sewing table very well, and I have a couple of the lights pointed towards my fabric storage cabinet. The new studio will be longer–it will be 11 1/2 feet by 20 feet. But there will be a closet, so I guess I should say that the main area of the studio will be 11 1/2 feet by 16 feet. I will move the track lighting out to the studio. I think that adding one more florescent fixture (4 ft. long) will light the room well. Does anybody have an opinion about this?

Here's the space with the flooring and siding completely removed!

Here’s the space with the flooring and siding completely removed!

Monday I am going to go and look at flooring, doors, and windows, and paint colors (for the outside of the house.)

I am using my handy dandy notebook with the graph paper to draw out my ideas on how I want to lay out the furniture/storage. And it just happened that there was a virtual studio tour online the past two weeks, so I have enjoyed looking at those ideas as well. I think the thing I liked best was that some of the artists showed their studios in their natural state–made me feel a little better about the mess I usually have!