Beading and Other Stuff

I showed you the start of this beading project, but never showed you the final product. Once I started beading, it went fairly quickly. Much faster than embroidery, in my opinion.

DSCN5906

And some close-ups:

DSCN5907

DSCN5910

DSCN5908

DSCN5909

I finished piecing together that giant quilt, made a sandwich, and quilted around each smaller block to stabilize it. And then I pondered hand quilting it. In the meantime, I was sitting in church, and wrote in my journal, “my next big quilt must be about PEACE.” And later in the week I realized that I could make THIS BIG QUILT about peace. So I marked out huge letters “PEACE” on it, and know that I’ll hand stitch those. And then I chose 12 excellent verses on Peace, and marked 12 spots on the quilt where these will be hand stitched. But in the meantime, because it is so huge and heavy, I think that I will machine  quilt it. That way it might actually be finished in this time period where we all need to think about peace and what it means for each of us.

DSCN5920

I’ve also started back to work on my series “Characteristics of God.” I’m hand stitching the words and then machine quilting each piece. Still pondering how to finish the edges. There are only 10 pieces in this series, so I am hopeful to complete them soon.

IMG_4116

And in the meantime, my fascination with hexies has not diminished. They are fun to make, and relatively mindless at this stage. Just right for evenings sitting by the fire with two dogs on my lap and watching my TV shows.

DSCN5868

Recovery and Creativity

Well, here I am, three weeks post-op already! If you want to read more details about my knee replacement surgery, you can check my other blog. I’m writing several posts detailing my experience in case it might be helpful for someone else considering knee replacement surgery. For the most part, it has all been so much better than I had heard from other people, and I am so grateful for that. The doctor did not know before he actually started the surgery, but it turned out that I only needed a partial knee replacement. Such good news for me in the recovery room!

I thought I’d share here about my creativity (or lack of it!) during my recovery time. You might remember that I was all prepared with four neatly arranged projects for me to choose from while I recuperated. Well, it turns out, none of them worked for me. I didn’t like beading in my lap, and I’d take the other projects out of their boxes and just stare at them. It was too hard to make a decision about where to start, or what color thread to use.

My best friend was here, and she tried to encourage me with various ideas. She had brought practically her whole studio with her 🙂  One of the things she brought was her AccuCut machine. She suggested using a charm pack that she had bought (and that I had admired,) and using that along with some of my reproduction fabrics to make a hexagon quilt. It turns out, that was just what I needed. I like sewing those big hexagons together. And of course, I love choosing fabrics for a new quilt.  Choosing which hexagon to sew to the next hexagon didn’t tax my brain too much.

Here’s the beginning of my fabric choices (you can see the charm pack in there–brighter colors than the rest):

IMG_3514

And here it is in progress:

IMG_3523

After a while, the only way I know to figure out how a hexagon quilt is progressing is to lay it out and then sew a chain of hexis in a straight line so you will know where the edge is supposed to be.

IMG_3529

And here, after 2 1/2 weeks of recovery, which included a lot of exercise, a lot of naps, and a lot of sitting, sewing, and TV watching, is the finished quilt top. It measures 50X70 inches. It will be a nice lap quilt for someone.

DSCN5731

This week I have done little bits of sewing on my machine, and even a bit of quilting on the Juki. I still don’t enjoy letting my leg hang down, so have kept those sessions short. I was finally able to start embroidering on one of the projects I had pre-prepared, and soon I will clear off my cutting table/desk and set up a beading station. I am determined to work on my beading!

Inspiration

DSCN4986

Inspiration? Where does it come from? And when do you know its right? What makes some art “good” and other art “no good?” Recently I’ve been working a lot on a whole cloth embroidered piece. I had a general idea when I started, and of course, that idea has gone through several transformations since I started. But at each stage, I have despaired at whether or not this is a “worthy” piece. Should I just give up? Or should I continue on? How do you know when its time to stop, or if the next step will be just what the piece needs?

DSCN4988

I was encouraged to read Denise Schmidt‘s words in the new book, Abstract and Geometric. She is a trained AND commercially successful artist. She said

Looking and seeing is the only way to know. If I am not happy with how a quilt looks, the only way past this is to uncover what is not working by trying other solutions. Anything that changes your perspective can be a tool that helps you see more clearly. It can sometimes be a challenge, and no one is immune to it, but it is part of the creative process. I wish I could say it gets easier, but somehow it is always the same. It is less painful if you give yourself over to it and accept that design is a process of trial and error, of getting out of your own way, and of knowing your tools.

Okay then. So the other day I decided to spend the whole day working on this piece (I usually work on machine work during the day, and only hand embroider in the evening.)

DSCN4987

I decided to see if there was a good movie to watch while I worked. I chose one called Imber’s Left Hand. SO inspirational! This was a well-known artist who got Lou Gehrig’s Disease. Early on, he lost the use of his right hand, and so he just switched to his left hand and continued to paint. Lou Gehrig’s disease slowly erodes the use of all of the muscles in your body, but Imber continued to paint until 3 days before his death. And as I watched, I saw the exact process that Denise had described–many times he would paint something, and decide that it just wasn’t working, and paint right over it.

DSCN4989

And there’s the rub, right? Our work, whether with machine or by hand, is painstakingly slow compared to other artist’s work. And its not so easy to wipe it out or do it over. Sometimes we just have to let it go, and start from scratch with new information about what works and what doesn’t.

So you might have noticed I am not showing you the entire piece. That is because I am so unsure of it, so wondering whether to give up or go on. The piece is on the design wall now, pondering the next step. And, encouraged by these other artists, I am going to go into the studio and let myself cut up more fabric and put it back together. I am going to try my next big idea, not knowing whether or not it will work or whether it will be considered art. I am going to accept that design is a process of trial and error.

DSCN4991

Inspiration

In just a week I am heading to Pacific Grove to attend Empty Spools! I love Pacific Grove (my favorite knitting and quilting shops just a block away from each other) and I have toyed with the idea of attending Empty Spools for a long time. When I saw Katie Pasquini Masopust was going to be teaching, and her topic was Artful Log Cabins, I decided to go for it.

You’re supposed to pick an inspiration picture, and I thought I’d share my inspiration with you. I went back through the millions of photos on my computer, looking for ones that I loved, and that I thought might work for this class.

Summer garden:

dscn0081

My house (notice the smoky background? this is when I returned home after evacuating during the big Butte fire.)

img_1544

My favorite flowering almond bush:

dscn3830

Flowering cherry tree:

dscn2720

The “secret garden” at Belknap Hot Springs in central Oregon–one of my favorite places on earth!

img_0698

Just a rose at a traffic stop:

img_1555

Lantana, another of my favorite flowers:

img_8053

The summer garden. Ultimately, I chose this picture, because I thought it had a little more contrast than some of the other pictures, and also because when I saw a thumbprint of it, I thought the light shining on the tree trunk looked like a cathedral window in the middle of a garden.

dscn4346

I had 8X10’s made of each of these pictures, and I have to say I am enjoying looking at them. I plan to take them with me to get Katie’s input on whether they will work for this technique.

Stupid Sewing

A few days ago I was talking to my BF, and tried to express what I was feeling. “I don’t have any hand sewing project right now. I want to do something, but don’t seem to be able to make a decision about what to do/how to put it together. I look at artists like Judy Martin and Penny Berens, and it seems like they just work without a plan, but I know that that’s not true.” I was having trouble expressing what I wanted to say, but my BF knew just what I needed “Its time for some stupid sewing!” she said happily.

Stupid sewing. I don’t think we coined the phrase, but basically it means just sewing together fabric without a plan or any pressure to make something significant. It may or may not turn out well. But in the process you are freed up to create, and sometimes the act of creating will teach you what you need to do next.

So stupid sewing it was. I had set aside this piece of golden brown fabric, thinking that it might be nice to embroider on. And I had made a few larger yo yo’s with the new yo yo maker I got myself for Christmas. I thought that the print I used for them was just outstanding. It was a beginning.


In short order, I put together this little composition, used wool batting, muslin backing, and chose a few colors of threads, and there it was. SOMETHING I could embroider on.

dscn4857

Pretty fast I noticed it did not have enough color and contrast. Got out the pile of cherrywood bits and pieces and cut some small squares to add. Oh, and maybe a few smaller yo yo’s.

dscn4863

That’s better.

Now, one of the things I learned at Nancy Crow’s workshop is that prints are sometimes difficult. I LIKE prints. But she is right. This print on the side is somewhat distracting. It might get some stuff put on top of it. But for now it stays.

My mind is working, and I am learning things as I go. Best of all, I am happy to have SOMETHING to stitch in the evenings.


Yo Yo’s!

Here is a project that I have been working on for YEARS! And by that I mean–I started it, and then got bored so it went in the closet. And then maybe a year later, I ran out of handwork, and thought–Yo Yo’s! And got them out and worked on them for a while until something more interesting came along, and back into the closet they went. And on it went, and still goes.

The project started with a group of fabrics that I really liked, in colors that I don’t usually choose–mostly browns with a few greens thrown in. And originally, I think I saw some scarves made out of yo yo’s and that is what I wanted to do. I started joining the yo yo’s into blocks 4X6. And I liked them so much that I thought, I’ll make a quilt! Do you know how long it takes to make yo yo’s? I timed myself last night. One yo yo takes 5 minutes, and so 24 of them takes 2 hours, and that does not include sewing them into their 4X6 block!

Anyway, I kept thinking about combining them with little “quiltlets.” Like make mini quilts the same size as the yo yo blocks and alternate these quiltlets with the yo yo blocks. I thought I would use the same group of fabrics I had been working on, and it would just be very scrappy.

When I finished the kantha blanket, I got the yo yo’s out again. And this time, I had the thought to use one unifying fabric for the alternate blocks. I got out this favorite dark fabric, and I LOVE the way the yo yo’s look on it.

dscn4766

So now I am a little more motivated to work on my yo yo’s in the evening. If I want to make a quilt 54″ X 63″, I need 54 yo yo blocks. (I am using the “small” yo yo maker. The finished size is about 1 inch.) I have 12 made. I am not going to do the math of how many hours that will be. I will just keep making yo yo’s between projects, and someday I will have a yo yo quilt 🙂

And kind of along the same lines (taking a long time to complete a work) but completely different–watch this short video of this incredible artist at work. He took 3 1/2 years to complete this. It took my breath away.

And Lastly…


While patiently awaiting the return of my Juki, I started work on a new series. It started out with inspiration by this weaver. The more I looked at her work, the more I saw the “quilty-ness” of it. Then I started drawing little sketches in my journal. And I decided to let myself play with my collection of hand-dyed fabric–some Cherrywood, some Ricky Tims’, and even some of my own hand-dyes.

dscn4718

These are all really simple designs. But I enjoyed creating them, and choosing “just the right colors” for each. The small pieced squares that I am using in each were created on my Colorado retreat!

dscn4717

I am going to use these pieces for a series on “the character of God.” I wanted to use characteristics that most people could relate to. And then I found an article where the author made two lists–one of characteristics that applied only to God, and the other of characteristics that He shared with man. That helped to define what I was thinking about.

dscn4716

So although they are simple, they also provide a somewhat blank canvas that I can use to embellish with quilting or embroidery just the way I want.

dscn4715

dscn4719

dscn4714

P.S. Just got word that my Juki has been shipped! Yahoo!

Sometimes the Thinkie Part is the Best Part

embroidered-quilt-1870s

Once again I have noticed this quilt block that I saved on my desktop.

I am mesmerized by it. From a quilt made in the 1870’s. I think it would be so fun to make with my zig zag technique. To say nothing of the massive amount of embroidery on it! I don’t want to do that kind of embroidery, but it is definitely a big part of the design concept and the success of the overall design.

I want to go directly to the studio and start cutting out fabric. I even have a collection of fabric that I think would be fabulous for it.

Plus, look! Every block on the entire quilt is using different fabrics and colors. You know how I like that.

embroidered-quilt

But I am in the midst of quite a few projects right now. Some of them are very near completion, and I just have avoided the final bit of work needed to finish them.

And, I don’t even want to say it out loud, but the studio needs a massive cleaning out before I mess it up with yet another project.

All this sometimes makes me frustrated. But then I remind myself that part of the fun of a new project is the time spent thinking and refining a plan. Adding this and that, taking away something that doesn’t work as well.

So for now, I will keep this project in the thinkie stage, and remember to enjoy that 🙂

Time Away

I just returned from a week-long trip to the little town of La Veta, Colorado! My BF decided that she wanted to take an intensive workshop with Judith Baker Montano, and I said, “want some company?” I have done “self-retreats” before, and find it very profitable to spend concentrated time working on projects at a location other than my studio. Plus, Colorado? That sounded fun!

All the other times I’ve done this, I traveled by car, so I could bring all the supplies I wanted. This time we would be flying, and so I had to carefully choose what I would bring. My friend Ricky Tims also lives in La Veta, and he very graciously loaned us two of his sewing machines! So all I needed was to pare down the raw materials I would bring. I ended up bringing my bags of Cherrywood fabrics, a quilt blanket “blank” for embroidering on, and then cut out 8 squares of hand-dyes for a new quilt idea I wanted to try starting on. I also brought some muslin and batting “just in case.” And of course, a big supply of perle cotton thread, scissors, rotary cutter, pins, etc. LOL, both Robin and I forgot machine sewing thread! Fortunately, Ricky had some nice thread for sale in his studio 🙂

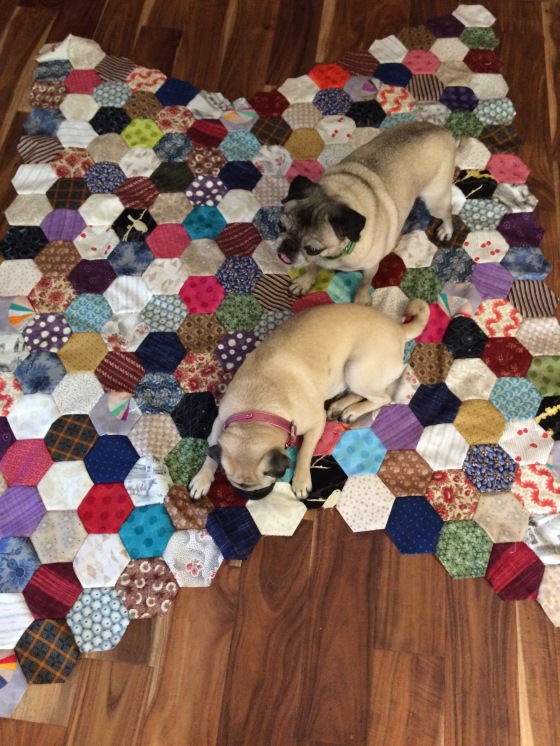
We found a great place to rent, with plenty of room to spread out all our quilting supplies. In between visits and “touristing” I managed to get quite a few bits and pieces done.

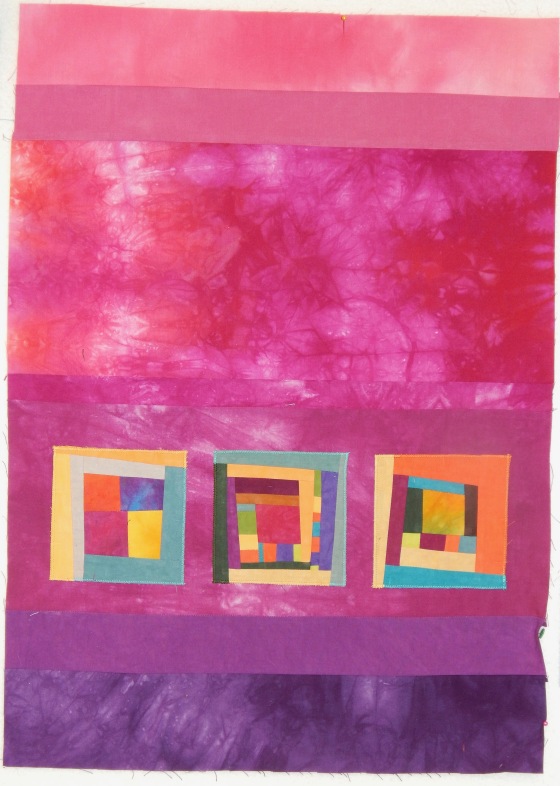
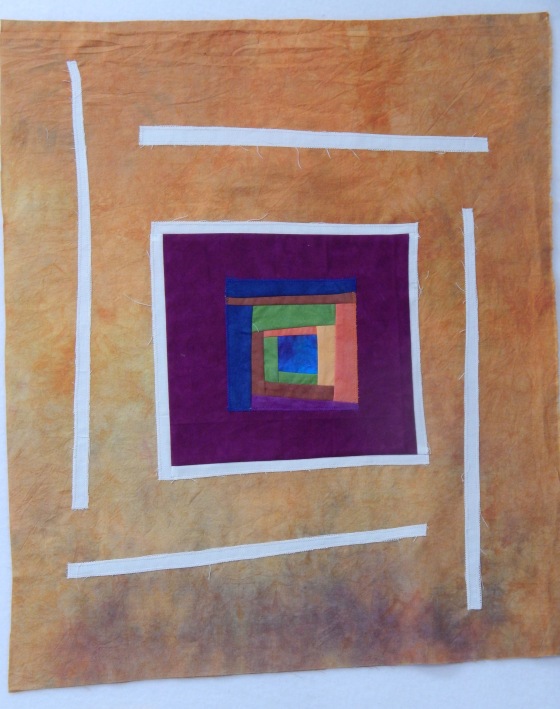
I admire piecers who work with small bits so very much. One of my current favorites is Maria Shell–check out her work in this blog post! So the first thing I wanted to do was to do some piecing with my bags of Cherrywood fabric. I also had a scrap of Ricky Tims’ multi-color fabric, and I decided that I would cut the center squares out of that, and then use the cherrywood bits to make some abstract log cabin blocks. Nothing was cut straight, but as I finished each piece, I squared it up to 4 1/2 inches. At the end I made three 6 1/2 inch blocks.

DSCN4381

Now, although I admire the work of others who work with small bits, this is about my limit. I get bored. So I will sit and think, and eventually these pieces will work their way into one or more projects. I did this a couple of years ago, and I used all those little blocks to make the “what they said” series, as well as several other pieces.

Next, that big blank canvas for embroidering on. I also admire the work of Judy Martin, Penny Berens, and others who work on daily “scratchings.” Once again, I don’t think I really want to spend the time doing this EVERY DAY. But I love the idea of it. So that was in my mind when I took this big (for me) blank  quilt sandwich to embroider on.

DSCN4378

The first day I took it out and stared at that big empty space, it started to rain. Evidently, this is “monsoon season” in Colorado, and the afternoon rains are very welcome. They don’t last long, and they cool things down nicely. So I embroidered that.

DSCN4380

Ricky and Justin took Robin and I out to their property (45 minutes from town!) and on the way there was an old church, the last remaining building of what had once been a small town.

IMG_2665

I was fascinated by it, and took several pictures of it. I decided that I wanted to try embroidering it.

DSCN4379

You can see with both of these that I started by cutting out simple shapes and using blanket stitch to embroider them to the blank. Hand dyes work very well for this–practically no raveling at all. I really enjoyed the “grass” stitching. Very quick and simple. I hope to do more of this.

So these embroideries were a little departure from most of my work–more representational than abstract. I enjoyed doing them, and I wonder what it will lead to. Right now I think I will keep this blank as a true travel project, and will take it with me on my travels, and add a bit to it with each new location.

The last day I got out those squares of hand-dyes that I had carefully packed. I spent a lot of time staring at my journal, making notes and thinking, and finally started two of the squares. They are for a quilt of Genesis. My brother suggested it, and I think it will be a very interesting project. Of course, some of the blocks will be on creation, but there are other interesting stories in Genesis that I am challenged to try to represent in cloth.

And now home, and I reverted right back to working on my Hallelujah Chorus quilt. I have three word panels done, and one and a half circle panels. I am motivated to work consistently on this quilt. Not only is it enjoyable to work on, I would like to finish it by November for several different display possibilities.

DSCN4377

A Little Idea

A few years ago I made this little quilt. I pieced a background of various green plant fabrics, and then I just cut out motifs from fabrics that I loved, sometimes of things that I loved, and had fun placing them in “just the right spot.” I think it was a travel project, because all the motifs are sewn on by hand.

Anyway, what to do with it when its done? Its kind of childish. When we were kids we had a couple of books that we loved our parents to read to us. But mostly we loved looking at the pictures and naming all the things we saw on each page.

So I had the idea that this would be a good baby or little kid present. I finally got around to mailing it yesterday to my niece, who has 4 little kids.

DSCN3903

You could use fusible or zig zag to sew the motifs on, to make it more kid friendly. It was fun to make, and I hope will be fun to receive.

DSCN3904

DSCN3906

DSCN3907

DSCN3908

DSCN3905

I enjoyed looking at it again yesterday, and remembering putting it together. I’m glad I took these pictures so I will have a memory of it.