After Ohio

Here I am in Ohio next to my quilt He Holds All Creation Together:

IMG_0389

Okay, I will do another post on the marvelous rug show at Sauder Village later this week. But first I have to tell you what I did when I got home.

I had left my big PEACE quilt almost finished. I needed to quilt around the big letters PEACE. So I started in on that Monday morning. It all went well, EXCEPT I changed bobbins, and put a little oil on there like I always do, and then when I started back in (AND I SWEAR THIS HAS NEVER HAPPENED BEFORE) an oil stain appeared with the first few stitches. EEEEEEEEEK!!! I finished the quilting and was still so enthusiastic that I spent a lot of time putting on the binding. And then it was time to soak it. Oh, but first I water sprayed all the blue lines on it, which were just direction lines to remind me where I wanted to do horizontal lines or vertical lines. And then I soaked it in COLD water. But first I put a TON of Shout stain remover on that grease stain. And to be honest, I forgot about the grease stain until just now (I checked, and its gone) because when I took the huge quilt out of the washing machine, there were red and magenta stains ALL OVER IT. I mostly used commercial fabrics in this quilt, but I used just a bit of red and magenta hand dyed fabric. And this all happened in COLD water.

At that point I swore that I would NEVER AGAIN USE HAND DYED FABRIC. And then I pulled up Vickie Walsh’s EXCELLENT directions for removing dye stains from a quilt. Bless her over and over. She made me use my bath tub, because the large quilt needs to float freely in the hot water and Dawn dish detergent. I soaked it for a couple of hours, and then drained the water, put in new hot water and soaked it overnight.

And can you believe it, all the stains are GONE!!! I am so pleased with how this quilt came out. You can see the big word PEACE, and there are 12 verses that speak about peace scattered around the quilt. Here are some of my favorites:

Do all that you can to live in PEACE with everyone.

Search for peace, and work to maintain it.

Those who are peacemakers will plant seeds of peace.

DSCN6244

I will try to get a rug show report up by Friday. There were so many beautiful rugs there, I might have to do two reports to share it with you.

Back from Cambria, and What Did I Do?

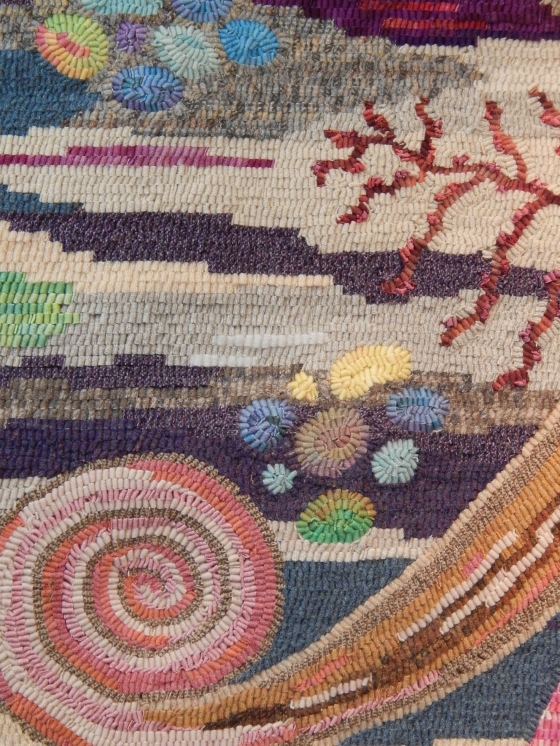
I had a wonderful time at Cambria Pines Rug Camp. I did bring my blank linen canvas for the rug. Its only a 24″ square rug. I try to vary my large rugs with smaller rugs. I kept looking at my inspiration photos, and decided that I did want the large circle in my rug, so I started with that. And then I added some of my own motifs from a few sketches that I had done. I’m very happy with what I was able to accomplish in four days.

DSCN6190

When I came home, I had so many other things to take care of, there was very little time to get into the studio. But I was looking at a blog, and I saw this picture.

beautyremainslandscape

I didn’t even know what it was, but I just had the urge to recreate it. So I printed out a copy of the picture and then went through my hand dyed stash to pick out similar colors. For a week I just spent time cutting out rectangles during any little bits of time I had available. And then I finally started assembling them on my design wall. While I was doing this, I kept wondering what this was actually a picture of. So I went back to the blog where I’d found it, and believe it or not, these are garage doors in Lithuania!

At first I couldn’t figure it out. But I went to the photographer’s site, and I think these garage doors are pieced together in a photo. Any which way, I was fascinated by it. I thought about putting in the black and white bits between the doors, but decided against it. I am thinking about embroidering in all the wear lines. And here is what I came up with.

DSCN6188

Okay, so I didn’t realize until I was putting this blog post together that I had turned the photograph upside down when I started assembling it. Of course, I can turn it so the blue is on the top, but I kind of like it this way.

I had leftover rectangles, so I decided to try to make a composition myself. I found that my natural inclination is to put pieces on a diagonal. So I kept playing with it and eliminating most of the diagonals. But in the leftovers, there weren’t as many colors, so I’m not sure its worthy. Just leaving it on the design wall for now.

DSCN6189

Barb asked an interesting question on my other blog:

Sometimes I feel like I’m drowning in hobbies and projects. I’m making quilts, crocheting a scrap- using throw, embroidering, mini weaving, knitting socks, making fabric jewelry, etc etc etc….Do you ever want to throw up your hands or just sit and stare at the piles of projects?

I do have a lot of projects going at one time. But I like that. Before I had carpal tunnel surgery, I knew it was really important to use my hands in different ways, and not just keep repeating the same movements. So that’s how I justified having so many different types of projects going. And sometimes I do get overwhelmed with the projects, so that’s when I very neatly put a project into a project box and put it back into the closet. This week, Barb, when I had so many other things to do, there were a few evenings when I did just sit and stare at my projects. But for the most part, I enjoy knitting or hand stitching in the evenings. If I can’t get into the studio in the morning, most days I’m not going to get much done out there. So I really try to plan my day that way. But last week and this week I have an unusual number of appointments and obligations, so I have resigned myself to not getting much done. Working on that small colorful project that I was basically copying was just right.

This ‘n’ That

First of all, a big THANK YOU to the people who suggested using Vicky Welsh‘s method of dye stain removal. It worked!!! That will be my go-to method in the future. Hopefully I won’t have to use it too often.

I finished another almost-completed quilt. I had stopped because I wanted to somehow be able to do “cobblestone street” quilting in the white sections and I didn’t know what to do. Then, I started making these brick patterns on some of the “what they said” quilts, and I knew that was what I wanted to do. This is actually a verse in the Bible–in Jeremiah 6–but in The Message paraphrase. I really like it.

dscn4490

A question about the Juki came up. It is a long arm sit down Juki. I got it in February. And there was a learning curve, which I hated. But now that I’ve gotten more comfortable with it, I love it. It seems to work right every time I start it up. I still keep a little sandwich nearby to try out the stitches, especially after I change the bobbin. I wrote about the learning curve on the Juki here and here.

And speaking of learning curves…This Hallelujah Chorus quilt just about did me in this week! I knew it was going to be difficult to work with. Each panel was made into a sandwich for the embroidery. When I was all done, I cut out the excess batting and backing, so now each piece was partly floppy silky fabric and partly heavy quilt sandwich. I had planned to cut each down to a specific size. I had kept fairly good notes on my plan. Then I changed my plan. Why not make them all 36 inches instead of 32? Oh, except one of them I had cut to less than ‘width of fabric.’ And then, something went haywire with my math brain. 34 + 12 = 46, NOT 44. Egad. Anyway, it took several days, and a couple of breaks to calm me down, but I got it put together into a quilt top. And now I have to figure out what else I am going to add to it. Either more embroidered circles or some very nice quilting.

dscn4515

Adding to my angst (maybe that’s what happened to my math brain) was thinking about how I was going to make the quilt sandwich. I usually use all cotton fabric and batting and rely on steam to do a great deal of the work. And I knew that would not work with this silky fabric and the wool batting that I was planning to use. So I googled “making a quilt sandwich with wool and silk” and of course, there was an answer. The author used misty fuse and fused the entire top, and then strips of fusible to adhere the backing. So I tried this. And I found, once again, that I DO NOT LIKE FUSIBLE. That’s just my own preference.

Here’s the sample I made with the fused top.

dscn4517

Then I made a sandwich with no fusible at all. I pinned fairly closely, and then took it to the machine to machine baste it. BTW, I LOVE the basting stitch on the Juki. It is very stable and does not distort your sandwich. So then I did as I usually do, and just removed the basting stitches from the small area I was quilting on. I don’t know if anyone else can tell the difference, but I think the quilting is prettier and softer without the fusible.

dscn4516

And then, to reward myself for my hard work, I allowed myself to make a quilt sandwich with some fun “homespun” cotton fabric to embroider this saying, which I love. Because I really hate dusting 🙂 Thanks to Kris for sharing this. I’ve had it on my computer desktop for a long time.

dust-if-you-must

Busy Busy

I have been busy busy busy. Finishing and quilting and embroidering and starting. Here’s what part of the studio really looks like.

DSCN4488

I actually finished all eighteen of the “what they said” series. I will do a slide show for you soon. But I have a question. Five of them had some of the hand-dyed threads on them, and the thread colors ran. I put Shout on them, and then I ran them through the washer with a “color catcher.” Some of the offending color came out, but not all of it. Do any of you have any other ideas? Have you tried applying color-safe bleach with a Q-tip to the dye stains?

Anyway, I am very happy to have completed them. My plan is to mount them on cradled wood panels. So that part is not done. I will order some this week, to make sure my idea will work, and then I will order the rest of them.

That left the Juki free. And so I got out two almost-finished quilts. I placed the lettering on one, and then, because I had used a “brick” design on some of the ‘what they said’ quilts, that was exactly what I had been wanting to do for the quilt nearest the Juki. The verse on there refers to a crossroads. I finished quilting that today. Only needs to have a binding on it. and a sleeve 😦

By the way, I love the Juki more than ever. I love how very accurate  each stitch is. It is easy for me to exactly stitch over a line of stitching to get to the next area I need to work on.

You can see some of the panels for the Hallelujah Chorus quilt perched over there on the chair. I have almost finished the panels and the four large embroidered circles, and so this week I should be able to put the panels together into a quilt top. And then I will have to decide what the next step is. More embroidery, or machine quilting. Any which way, I am very excited to get to this next stage of the project.

I entered four quilts in Quilting in the Garden, and they were accepted. This is such a nice event, and of course, I LOVE the nursery where it is held. I am planning to take my mom to it this year, and thought it would be fun for her to see some of my quilts hanging.

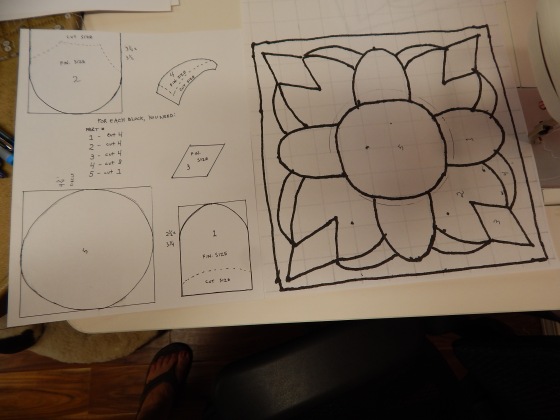
And then, about that “thinkie” project. I spent a little time on it. I traced the photo on my 1/4 inch graph paper, and then went to the copy store and enlarged it 400%, which made it a 10 inch finished block. Then I spent some time drawing a pattern for it.

DSCN4442

And made one block.

DSCN4451

I don’t like it. I can see that the embroidery makes a tremendous difference in the appearance of the block, and choice of fabrics also is important. Anyway, I might try again, using some of my reproduction fabrics. I also drew a different design, and I am interested in trying that also…

I made the pattern because Kris had suggested that it might be a fun group project. I don’t think that’s gonna happen, but if any of you are interested in the pattern, you can email me (schnabel@volcano.net), and I will be glad to email you a copy of it.

So that’s about it for now. I started working on the rug of Noah again, and I occasionally knit or work on my Kantha blanket, just to get a little color in my life. I have more ideas for some fun color-work blocks, but they are still in the thinkie stage today 🙂

Blocked!

Usually on Monday I am raring to get into the studio and start working. I had lots of things I could work on, and new ideas that were begging to get started. I just could not make myself start on any of them. Maybe its because I was feeling extra stiff–yes, we’ll blame it on that. I went to the gym and spent a good long time on the bike and in the pool.

Monday night I FINALLY finished stitching on this little piece–inspired by the cover art on the latest issue of Quilting Arts magazine and my planned trip to rug hooking camp. Stitching on wool seemed like the perfect travel project. But filling every square inch of this little piece with stitches took FOREVER. And what the heck was I going to do with it?

IMG_2617

Well….C., the same new friend from my SLO workshops who suggested the fabric to frame my little embroidered piece, took this wool embroidery and folded it and suggested making a needle-keeper (is that what they’re called?)

IMG_2618

So that’s what I did. Tuesday morning I had a plan. I decided to line it with a really pretty piece of dyed wool, and stitch those two pieces together with blanket stitch.

I didn’t want to sew the sides up, because I wanted to be able to lay it flat to see the design as a whole. Then I realized I wanted a pocket for my thimble, so there was the perfect scrap of fabric just laying on the cutting table, waiting for me.

IMG_2619

This was just the little jump start I needed. I spent the rest of the day in the studio, working on a project that I was quite enthused about… I’ll tell you more about that next time 🙂

What I Did First

When I come home from a trip, or when I have finished a large project, sometimes I don’t know what to do next. I used to worry that I was losing my mojo, and felt a lot of pressure to “get right back in there.” But after this trip, I felt relaxed about the whole thing. For a few days I concentrated more on working in the garden and exercising, something I hadn’t done much on this trip. That was good for me.

But I know that it is best to keep working consistently at your art. I have several projects to complete, and I have fairly well-formulated plans for some new projects. Plus, there’s “Noah!” But I chose a small embroidered piece that was almost done. I was pretty sure I could finish it in a day.

It was this small piece. I had finished up the embroidery on it (remember, it was already a quilt sandwich itself,) and I had attached a large border of a really nice textured fabric to it, added batting to the whole thing, and basted it well, so I could hand quilt it.

DSCN4144

Well, that did not go so well. Even though it was well basted, it was bunchy in spots. More bunchy than I am willing to put up with. I threw it in a corner and left for Cambria.

When I came back, I knew what I needed to do. I UNDID all that hand quilting! The batting was reusable, but I threw away the muslin backing. I headed into the studio to find an appropriate backing. There on the cutting table was this piece of fabric! I have put this piece of fabric in the “to go” pile several times. But I always rescue it, because it is a really nice Japanese fabric. Its just that it was dark and dull colors. This little piece was a bit dark and dull. This fabric would be perfect.

DSCN4202

As I laid it out to cut it the right size, I had the idea that if I cut it large enough, I could use it as an extra large binding, folded over from the back. I put together the sandwich, revved up the Juki, and went to work. I simply quilted along the block lines within the embroidered piece, and then changed thread colors, and did a simple grid on the light “frame” fabric. I carefully cut the batting one inch from the edge, and then the backing another two inches from that, so I could fold it over twice to make a nice firm binding, and I hand stitched it carefully to the front.

DSCN4198

Plans don’t always go this well. This little piece almost ended up in the discard bin, several times! The whole successful process tickled me so much I wanted to share it with you. Sometimes you do need to stop working on a project, but many times you just need to continue on, and see what happens.

When I walk by this piece now, I see a lot of blank space on that surround. Perhaps a little more embroidery? 🙂

Quilting, Piecing, Embroidery, and Rug Hooking

I mentioned to a friend recently that I had been quilting, piecing, embroidering, and rug hooking, and loving all of it. I kept thinking about this, and I realized that part of the reason was because I had “stations” set up for each activity, so that it was very easy to go from one activity to another. I never understood before why people felt the need to keep more than one sewing machine set up, but now I do. I am much more likely to work on a quilt when the machine is all set up and ready to go. (And I do know that having a big new “toy” is a good motivator.) When I started working on that big rug in January, I rearranged my living room so that I could keep the rug frame up all the time. If the rug frame is not up, rug hooking just doesn’t get done–sometimes for months. And of course, my Janome sewing machine is always up, and I am more likely to go and sew together a few pieces when I don’t have to move a big quilt out of the way. My “embroidery station” is the same as always–my big comfy chair where I sit every evening with a dog on my lap, watching TV shows on my computer, and working on whatever embroidery project is at hand.

It has been so fun to look through my UFO’s and find quilt tops I had completely forgotten about, and others that were within a few stitches of being completed!

I really like this quilt. I was influenced by a little postcard of a magnificent Japanese quilt. Mine is not magnificent, but it was very fun to piece, and I enjoyed practicing “straight enough” line quilting on the new machine.

DSCN3846

This was part of a series of quilts I did for a “Pay it Forward” challenge SIX YEARS ago! I had so much fun making those little quilts for three of my good blog friends. This fourth one was for me, but I used a beautiful upholstery weight fabric on the back, and it was not fun to hand quilt through, so 7/8th’s of the way through, I just stopped. Except for the border it was almost completely quilted. I decided to try hand quilting again. Took two stitches (literally) and knew I wouldn’t finish. So to the machine it went. I am as pleased as can be with the result. I’m thinking about keeping it, just because so many good memories are attached to that challenge project.

DSCN3863

This quilt was completely finished except for the central chicken block. I got a little obsessed about that, even wrote a blog about changing it out, and then it got put away and forgotten about. I finished quilting around the motifs in the central block, and it was finished. Several of these quilts have had enough backing fabric that I was able to do the binding by just bringing the backing around to the front. VERY convenient!

DSCN3847

Piecing. I think I showed you this one  before. I just about used all of the strips in that box, and so it is done. Since the strips were cut with a ruler, I’m not sure why it has ended up a bit wonky, except that I didn’t use my 1/4″ foot all the time. Anyway, I think I will put a wide border around it to finish it off and to square it up a bit.

DSCN3844

These stars are mostly my project for Sewing Day with my ladies. So fun to do, but a bit time consuming. All done with 2″ cut squares from my box of little two inch squares.

DSCN3842

I had the idea to make these simple blocks to offset the star blocks, which are so busy, but I didn’t like the way that looked. So they might become their own little project…

DSCN3843

Rug hooking! I LOVE love love working on this rug. There is even more of it done now, but this is the most recent picture. Like I said, I have a place all set up in the living room, so it is very easy to just sit and do a little bit of hooking, if that’s all I have time for.

DSCN3813

Close-up:

DSCN3812

And embroidery. I have almost finished the embroidered words on all 17 of the quilts in the “what they said” series. I loved working on these, and trying to convey the thoughts and feelings behind the words through the way I embroidered the words. Now to quilt and finish them. I will show them all to you at one time, as that is the way I think they will have the most impact. Here is the one I chose to use as the “header.” Just the straight line kantha stitching over the whole piece.

DSCN3887

And that is how life is going in the studio right now. I wake up every morning excited about what I am going to work on that day.

And the Handwork Just Goes On and On!

On the best days, I work in the studio until about 2 pm. By then I am tired, and ready for my coffee break. Which puts me in position (in my comfie chair) to start handwork. Here’s a few views of what I’m still working on.

The endless straight line stitching on the pinkish-strata piece. I noticed that a secondary pattern is emerging with the spaces between the stitches. I like it.

DSCN3160

And I went back to the green floral piece, and added some leaves in the spaces between the flowers.

DSCN3161

DSCN3162

Except for the never-ending needs of a garden in a drought, there aren’t too many unexpected interruptions, and life is flowing pretty nicely these days. Just the way I like it 🙂

In The Studio and On My Lap

Here’s the latest work being done in the studio–

I made the giant nine patch quilt top into a sandwich. First I made a pieced back for it. I’ll have to show you that after the quilting is finished.

DSCN2598

And I started working on the little snowball quilt idea I had. You can see that most of the blocks are 3 inch finished blocks. Then I made six, nine, twelve, and fifteen inch blocks to insert into the quilt. I thought of a lot of different ways to do this, but I ended up using the original little sketch I had drawn in my journal. I love having my little journal with me!

DSCN2599

I still have a lot of the 3 1/2 inch squares that I pre-cut for this quilt. I have another little idea in the works for them.

In the evenings, I usually move into the living room and have some handwork in progress.

DSCN2596

I’m working on another of  The Psalms quilts. Here you can see I machine stitched in the ditch to stabilize the background. But then I decided to do kantha style stitching over the entire background.

IMG_1024

Well, you know all about my circle love 🙂

IMG_1026

IMG_1028

And I finished the rug made from fabric strips. These rugs are so cushy to stand on. I really like having them in the kitchen, and they wash very easily too.

DSCN2586

After being washed:

DSCN2600

Its just right in front of the stove. And the little girls like to lay on them when they are waiting for me to make their meals!

On the Way to Organization

While emptying out my grandpa’s cupboard (where I keep the majority of my stash,) I came across a pile of squares and circles.

"Grandpa's cupboard"

“Grandpa’s cupboard”

The squares were left over from the recent baby quilt I made for a niece, and the circles were from an abandoned project (I think.) I also save the circles that I cut out of the background fabric when I zig zag circles on top.

(back of quilt top, showing the circles trimmed out.)

(back of quilt top, showing the circles trimmed out.)

Anyway, they were right near the leftovers of a cute print that I had used for the back of my niece’s baby quilt. Hmmm. I wonder if I could make something out of these? I have another niece who is pregnant, so need to be fair and make her a quilt too. And wouldn’t it be fun for these baby cousins to have similar (but different!) quilts.

DSCN0784

This project was so fun. I sewed the squares into four patches. I cut rectangles from the print to add to the four patches. There was just enough of the print to cut out two squares the size of the four patches. And two four patches that did not have the print added to them. Then I started zig zagging the circles on top. As I cut the back out of the circles (to minimize bulk,) I saved those circles to be used in other squares.

DSCN0783

After all the pieces had enough circles attached, I figured out how I could fit these squares and rectangles together evenly, and sewed them into strips, and then joined the strips into a small quilt top. I refused to put it on the design wall–just joined them together as they looked good on the sewing table. I love the way it looks. Its only 36″ square, so I plan to get some solids that match and cut 2 1/2″ strips to add borders all around. And of course, I still have a few circles to add to the borders. I will say that zig zagging pieces is a lot easier when you are just adding them to a block instead of a whole quilt top.

DSCN0780

Studio update: I have windows! And the huge organization/purge continues. I filled 6 grocery sacks with good fabric to give to my crafty sister and nieces! Don’t worry, I have plenty of fabric left for my own use…

DSCN0786