Taking a Break and Returning to your Work

This is not the first time I have declared a moratorium on my quilting. In the past, it caused me some angst–would I ever return to my quilting? Would I lose my forward momentum? How would I ever get to all the ideas I had if I kept taking breaks? Now I think that it is an excellent idea. It really frees up a lot of time, and I usually get more done than I had even planned on. In this case, it was finishing my little oriental hooked rug, and I had the added bonus of having the time to clear out my bedroom and closet, as well as the unexpected (and time-consuming) project of choosing paint and carpet colors!

Here is a bit of the new bedroom colors, along with the quilt that is currently on my bed. Good grief, I did not even realize until I saw this picture that the color I was trying to get for the walls was the EXACT SAME COLOR as the inner border of this quilt!!

DSCN1484

I returned from my adventures at rug hooking camp refreshed and looking forward to resuming my quilting routine. I left a lot of quilt projects unfinished, and I had a lot of new ideas I wanted to try out. Being a little bit disciplined won out, and I started working one by one on the unfinished projects.

First up, I finished piecing together the dark blocks for the cross insert in this quilt.  I decided to cut the cross with a wavy edge, and then decided that it would be easiest to raw edge appliqué (zig zag) this on top of the background piece. I liked the way it looked with the cross way off center. I will add words, but I’m not sure how I want to do that yet. I’ve already made the quilt sandwich and have all of the cross quilted.

DSCN1497

Here’s a close-up of the cross “fabric.” It is fun to do this, but also slow going, so by the time I have enough for a project, all the fun has gone out of it and I am ready to move on to the next project : )

DSCN1504

Then I remembered that I had this quilt in the closet, almost completed. I got it out, marked the places where I had missed the quilting, and got that done. It just needs binding to be completely completed. This is a quilt that I started in an Alex Anderson workshop on stars. I had this background fabric (that obviously I love,) and wanted to use it as my focus fabric. Its big enough to use on my bed. Hmmm…seems I do have a coral and aqua obsession going on here.

DSCN1502

I quilted the stars “in the ditch” and then filled in the background with huge feathers surrounded by spirals and bubbles.

DSCN1503

And this next project I can hardly believe myself that I got this done. I do not like working on large quilts. I do not like making big quilt sandwiches. But once in a while I make a quilt that just insists on being big. That is the case with that double wedding ring that I was working on before the moratorium. I really do like this quilt, and so I decided that I must make the sandwich. And I have to tell you, I LOVE my big ironing surface!!! It was big enough that I could use my “steam iron method” to make this sandwich in four quarters.

DSCN1499

I took this picture to show the ruler that I slip between the ironing surface and the quilt sandwich so that I can put the pins in. When I steam the quilt top like this I do not need to put very many pins in place. I usually take the sandwich directly to the machine and either machine baste it together or stitch in the ditch between the blocks.

DSCN1500

Oh, and in the measure twice, cut once department…DON’T do the math in your head. Write all the numbers down, and probably don’t do it when you are already tired. I was VERY SURE that I had made everything plenty big. I started making the sandwich, and the backing was only an inch and a half larger than the top on two sides of the quilt. That is cutting it a little too close, even for me.

It feels good to be home, good to be back working in my studio on my quilts, and very good to be back blogging about my adventures!


Where I Been, What I Been Doing

Wow, I knew it had been a while since I posted, but a whole month?? My lack of posting has not been an indicator of lack of work or creativity in my life!

I finished that “quilt kit” that I told you about. I’m not sure my zig zag technique saves any time over sewing all the pieces of a traditional double wedding ring together, but I still enjoy it very much. I followed my sketch exactly, so there was no time spent rearranging on the design wall.

DSCN1292

And then I finished the smaller quilt top that I had blogged about in my “Process” post.  This was fun to do. I spent a lot of time figuring out which fabrics to use for the background. And the motifs were shapes suggested by my sketch for the previous quilt. They were free-hand cut and then zig-zagged in place. Making them one piece (instead of 12 squares) made that go a lot faster. I am considering doing some perle cotton embroidery on them.

DSCN1290

And then, I liked some of the background fabrics I had auditioned for the previous quilt so much that I made them into a top of their own. I am going to cross-cut this quilt top and insert a cross for “The Signature of Jesus” series. I could not find a dark fabric that I liked for the cross, so I am in the process of “making” some fabric for the cross. Very fun to do, but time consuming.

DSCN1220

Oh, and somewhere in between all of that, I volunteered to work on a project for SAQA (Studio Art Quilt Associates.) This is for a “take and make” to encourage the public to make art of their own. I cut out LOTS of little pieces of fabric, and hemmed a bunch of blanks. And then I made some little samples. These are all made of bits and pieces of designer fabrics that we got at a place called FabMo in the bay area. The samples were very fun to make. No quilting involved.

DSCN1235


DSCN1234


DSCN1233

And THEN, I realized that it was only two weeks until my annual trek to rug hooking camp in Cambria! I enjoy this so very much (the trip AND rug hooking) but I do tend to put rug hooking on the back burner for months at a time. When I realized that it was so close, I put a moratorium on quilting and got to organizing my rug hooking materials. This is pretty much my entire rug hooking stash : ) (I have more, but it is all found material–suits and stuff from the thrift store. The rug I am planning on doing is going to be fairly colorful.)

DSCN1341

I realized that I didn’t have enough pale wool, so I had a little dying session. Very fun. But again, time consuming.

DSCN1376

And pretty much all the time that I would spend quilting or knitting I have spent working on this little “Persian” rug that I started in my workshop last fall. I don’t think I”ll finish it in time for camp, but I am very much enjoying working on it.

DSCN1397

And in between all of that, I have been gardening, and clearing out my bedroom in anticipation of J. the Contractor coming to work on my bedroom and closet while I am away.

Ahhh. So now we’re all caught up. I’ll be back in a week or so with a report on all the happenings at rug hooking camp!


Starting a New Project: Process

Someone asked me to explain my process for choosing fabrics for a new project, so I thought I’d document my process here. Maybe it will cement it in my own mind : )

This new project is an offshoot of the sketch that I drew for my quilt kit. I liked the way the drawing looked, and I started thinking about making the double wedding ring with a single pattern piece, instead of using the two inch blocks for the pattern. In talking it over with my friend, she suggested the idea of doing the kantha stitching in the pattern (I keep saying pattern because that piece is not an oval, and I don’t want to call it a football!)

Right now only about half of my stash is in the studio, and only about a tenth of it is readily visible. And yet, I found inspiration in those few pieces! I started out with these two pieces that I had bought recently. I do love the color and the patterns on these.

DSCN1208

And then I started trying to find fabrics that would go with them. I was looking for a “color wash” effect. Nope, one’s too bright, and one’s too dark. That pale one might work, and for sure I like the gray/blue paisley.

DSCN1209

My solid fabrics were in the house, so I tried those next. Nope, too solid. I wanted patterned fabric. But not TOO patterned : )

DSCN1211

Trying more solids. Nope. Give it up. You’re going to have to take a trip out to the storage shed.

DSCN1212

Oh, but before I go out there, I auditioned the contrast colors that I had spied in the studio–oh yeah, those are going to work great!

DSCN1213

Trying out more mostly solids in that red/magenta/coral/orange color way. These pieces could be solid colors, because they would have the kantha stitching on them, and I don’t want too much pattern to distract from the stitching.

DSCN1214

Alright, out to the storage shed, where I picked through my blue and red/orange/pink tubs to see what I could find.

DSCN1215

I found quite a bit!

DSCN1216

And then narrowed my choices down, and laid them out neatly so I could keep walking by and looking at them.

DSCN1217

Sometimes I am stubborn, and leave in a fabric that I love, even though it seems to stick out (like that dark bright blue in the middle front.) Sometimes those fabrics surprise you, and they do work. But lots of times I am finally forced to eliminate them.

And that’s how I choose the fabrics for a project. Most of the time I do not use all the fabrics that I have chosen, and most of the time I need to go to my stash for another color or pattern. Many times this is the fabric that I need to make the quilt “pop.”

Choosing the fabrics is probably my favorite part of the process.


Playing with Squares and Zig Zag

Some of you might know my penchant for working with little squares (two inch squares, to be exact,) and also my fascination with the zig zag stitch. I just think its fun to position the squares on a background fabric and zig zag them down, instead of actually piecing a block. Yes, there are raw edges. But I think it works. I have one quilt that I have used as a bed quilt and have washed quite a bit, and the zig zag’d squares are as stable as any pieced quilt I have.

IMG_9028

So anyway, I started daydreaming about the little squares and the zig zag technique, and the next thing I knew, I was zig zagging little squares in a grid on some neutral background fabrics.

DSCN0511


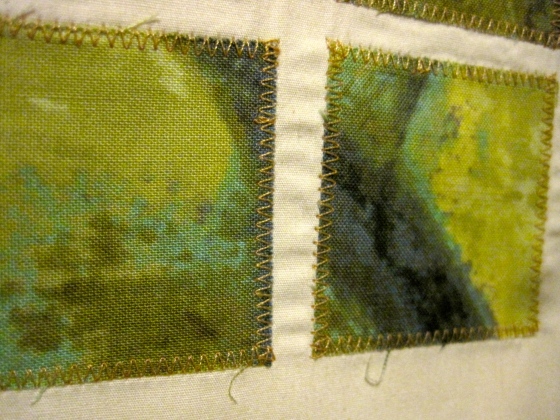
Close-up of the zig zag edge:

IMG_0038

After I worked on them for a while (thoroughly enjoying the process) I put them up on the design wall, to see if they were “worthy.” At first, I thought, no, not quite what I was looking for. But they are growing on me. I’ll probably do a few more today to see how I like them. This will end up being a bigger quilt if I continue on with these.

Here is another quilt I did with the squares and the zig zag stitch:

IMG_9022

And a close-up of how I quilted the zig zag’d squares:

IMG_9024

I am working on a lot of projects right now. Some of them are gifts, so I will share those at a later date. And some of them are just in process. I’ll share more as I progress.


And Back to the Zig Zag!

I really liked that technique of making the Double Wedding Ring blocks by zig zagging squares on top of a background block. So when I ran across this pattern in a magazine, I thought it might be perfectly suited to the zig zag technique. I cut the article out and put it in my ‘to do someday’ file. The new year was that someday!

The magazine article says this is the traditional Rolling Stone block. By using my method, I changed it from a block needing 25 little pieces (to be cut out and then sewn back together!) to only 9 pieces! (10 if you count the background block.) Love it!

Here is the single block:

IMG_9008

And here is a close up of the zig zagging:

IMG_9010

And here is the complete quilt top (squares are on my design wall, still need to be sewn together.)

IMG_9042

My design wall is in my bedroom! I love going to bed and staring at my current work, and thinking about what the next step might be. Last night I thought about whether I want to add a border to this, or to enlarge it. The answer to both questions was no. So I can get busy and put the top together and make a sandwich and quilt it!


More Double Wedding Ring

I thought I’d share a little bit more about the process that goes into my ‘double wedding ring technique.’ LOL. Its not really a technique. Its just the zigzag stitch. Here is the quilt that I pieced during my carpal tunnel surgery.

IMG_9028

It was fairly simple to position the squares on the background piece and place one pin to keep them in their place.

IMG_9029

And then I simply zig zag stitch around the edge of the piece, trying to catch one thread beyond the square so it will look neat, and so there will be minimum shredding of the fabric. I experiment and adjust the zigzag to the size I want. On my machine (a Janome 6500) that seems to be 3.0 and 1.2. You can see that I like to use a heavier thread and also a variegated thread sometimes. I think it just adds an interesting design element. Plus, it makes it a lot more interesting for me!

IMG_9027

I zigzag around each square, and just gently lift the corner of the overlapping square as I go by it. Sometimes I have to manipulate the stitches a bit to go around the corner, but I’m not going to attempt to describe that in words.

And pretty soon, one block is completed.

IMG_9026

Here is one more DWR quilt that I have made. I decided that these jewel tones went well with a beautiful large floral print that I had, and I cut those flowers out and fused them in place (even though I don’t like fusing that much!)

IMG_9022

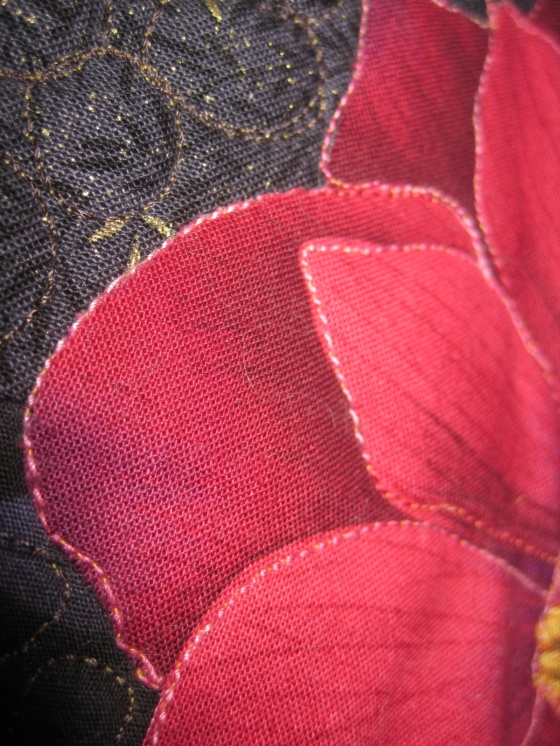
Here’s a close-up of how I just stitch carefully along the edge of the fused flower.

IMG_9023

And a close-up of the quilting on the DWR. You can see I chose another variegated thread for this.

IMG_9024

And one more close-up showing the bubbles that I quilted in the dark background. Gotta say, that was not fun, quilting with dark thread on a dark background.

IMG_9025

So that’s my adventures so far with the double wedding ring. I have used raw edge zigzagging on some of my other art quilts, both in the piecing and directly in the quilting. And I like it very much.


Double Wedding Ring

I thought I had shared this before, but evidently not.  This is a technique I came up with after several dismal attempts at the double wedding ring pattern.  I tried several different methods, both traditional and modern, and failed at all of them.  After staring at the modern pattern for a while, I thought, why wouldn’t this work?  Sure enough, I made a few samples, and it worked just fine.  This technique was the perfect ‘recovery project’ for my carpal tunnel surgery!  I made myself a little kit of pre-cut 12 inch background squares, and little 2″ squares to form the “rings.”  I think I’ll do a later post on exactly how I do this.  But essentially, I just pin the squares in place to form the rings, and then raw edge zig zag them in place.  I have made several of these, and have washed them several times, and they hold up just fine!  It is really very fun.

This is the first one I made.  After it was finished, I had the thought “After the Wedding.”  After the wedding, the reality of married life starts.  Its kind of messy, from what I hear.  So I decided to ‘mess up’ my double wedding ring quilt.  I ended up putting words on top of the sheer silk circles.  I consulted with my brother for words that work for and against a good marriage.  So it is apropos that I ended up giving this quilt to his oldest daughter as a wedding present.

forgiveness:

apathy:

selfishness:

hope and love:

compromise:

detail shot:

love never gives up:

Those spirals on the quilt are simply skinny strips of fabric that I raw edge zig zagged on the quilt.  And the last thing I added was some bits of lace.  Because every wedding includes a bit of lace, doesn’t it?